How to sterilize and recharge used potting soil without buying new bags
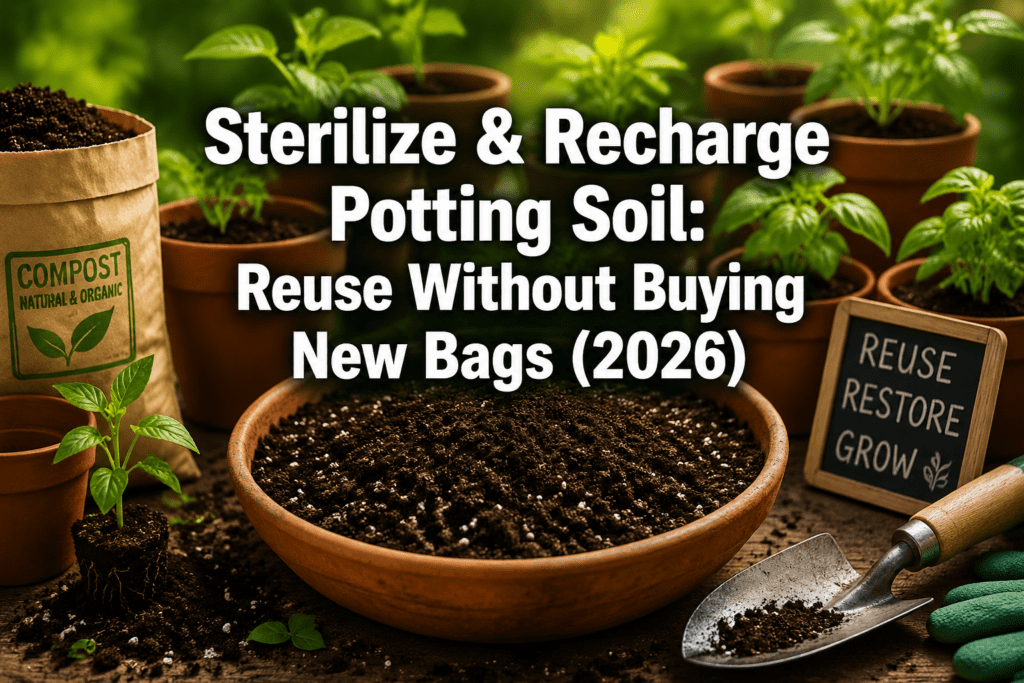
Quick Answer: You can effectively sterilize and recharge used potting soil at home to prevent disease and replenish nutrients, offering a sustainable and cost-effective alternative to continually purchasing new bags. This process typically involves heat treatment to eliminate pathogens and pests, followed by the incorporation of organic amendments to restore fertility and improve soil structure for future planting seasons.
Key Takeaways
- Sterilization is Crucial: Heat-treating used potting soil (via oven, microwave, or solarization) eliminates harmful pathogens, weed seeds, and insect larvae.
- Nutrient Replenishment is Key: Depleted soil needs organic amendments like compost, worm castings, and balanced fertilizers to restore fertility.
- Cost-Effective and Sustainable: Reusing soil significantly reduces gardening expenses and minimizes waste from discarded potting mix bags.
- Not All Soil is Reusable: Heavily diseased or pest-infested soil, or soil from plants treated with systemic pesticides, should be discarded.
- Simple Tools Suffice: Basic gardening tools, an oven or microwave, and a thermometer are generally all you need.
- Avoid Over-Sterilization: Excessive heat can destroy beneficial microbes and organic matter.
- Consider Plant Type: Most healthy plants benefit from recharged soil, but sensitive seedlings or high-value plants might prefer fresh soil.
What’s the Best Way to Kill Plant Diseases in Old Potting Soil?
The most effective way to kill plant diseases, weed seeds, and pests in old potting soil is through heat sterilization, with oven baking being a popular and accessible method for home gardeners. This process eradicates harmful organisms by raising the soil temperature to lethal levels, making it safe for reuse.
Oven Sterilization Method
Oven sterilization is a reliable method for small to medium batches of soil. It’s crucial to ensure the soil reaches the correct temperature without “cooking” it, which can degrade its structure and beneficial properties.
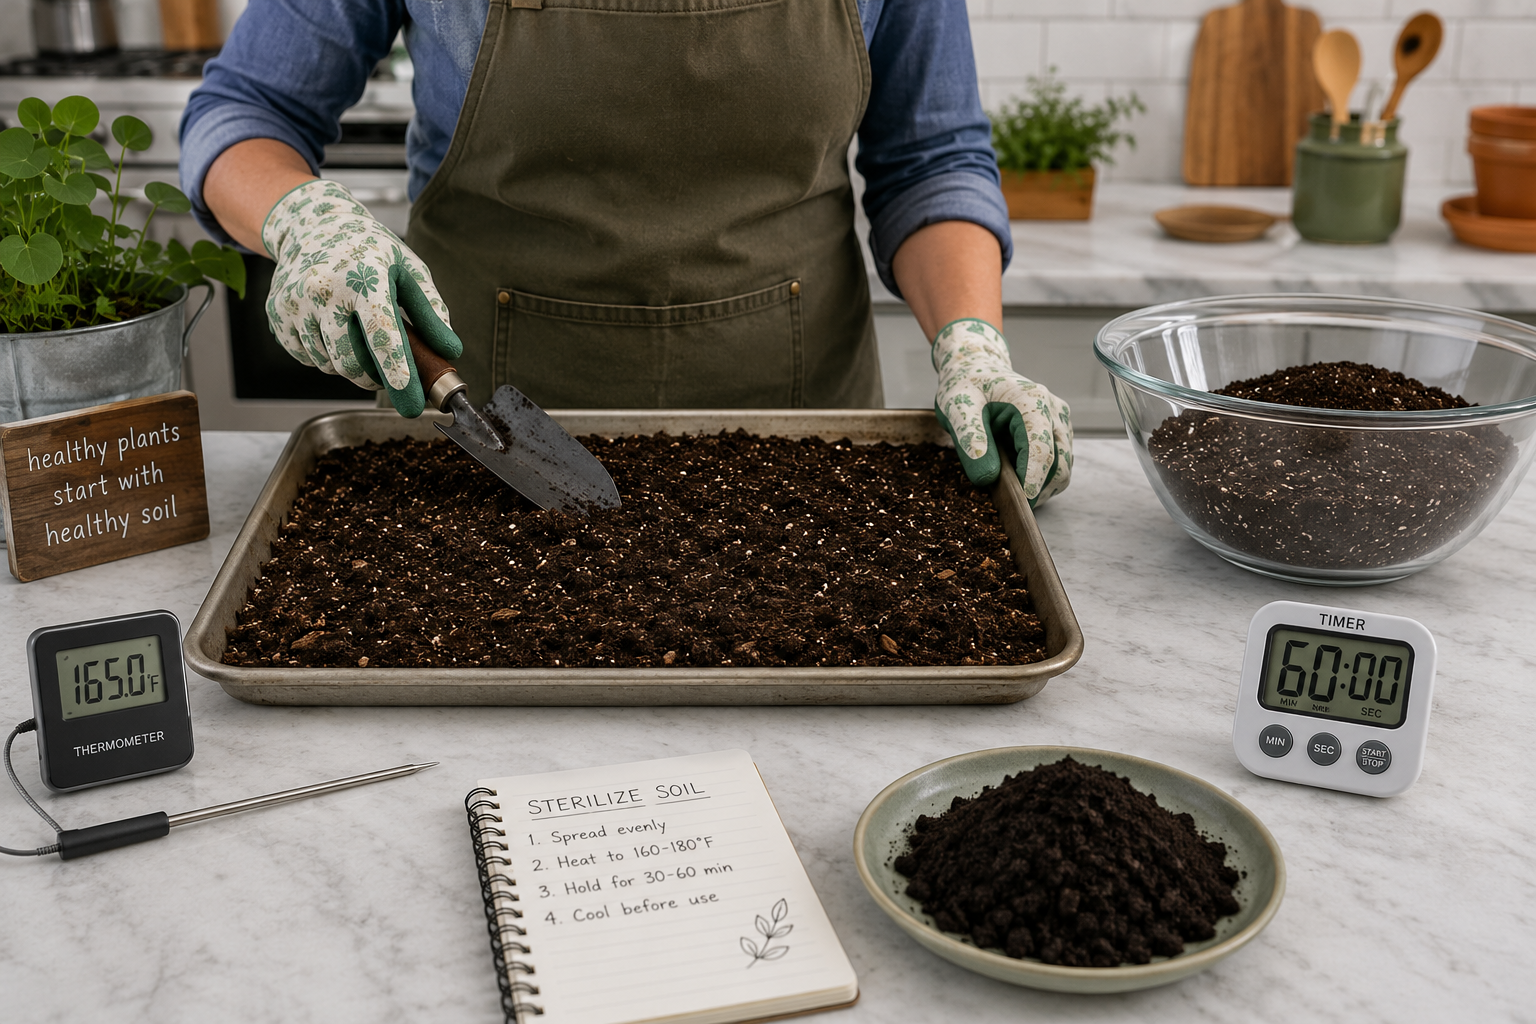
- Preparation: Spread the used potting soil in a shallow baking pan or oven-safe container, no more than 4 inches deep. Lightly moisten the soil—it should be damp, not soaking wet, to generate steam during heating.
- Temperature and Time: Cover the pan tightly with aluminum foil. Bake at 180-200°F (82-93°C) for at least 30 minutes once the soil itself reaches this temperature. Using a meat thermometer inserted into the center of the soil mass is recommended to monitor the internal temperature.
- Cooling: Allow the soil to cool completely before handling or using it. The foil should remain on during cooling to trap any lingering steam and prevent recontamination.
- Ventilation: This process can produce a noticeable odor, so ensure good ventilation in your kitchen.
Alternative Sterilization Methods
- Microwave Sterilization: For small quantities, moist soil in a microwave-safe container can be microwaved on high until steam is visible (typically 2-5 minutes per 2 pounds of soil). Allow it to cool completely before use.
- Solarization (Outdoor Method): For larger quantities in warm climates, spread moist soil in a thin layer (4-6 inches) on a dark plastic sheet in direct sunlight. Cover it with clear plastic sheeting, sealing the edges. Leave it for 4-6 weeks during the hottest part of summer. The sun’s heat traps under the plastic, raising soil temperatures enough to kill many pathogens and weed seeds. This method is generally less effective against deep-seated pests or tenacious pathogens.
Can I Reuse Potting Soil from Last Year’s Garden?
Yes, you can absolutely reuse potting soil from last year’s garden, provided it wasn’t heavily infested with diseases or pests, or used for plants treated with systemic pesticides. Reusing soil is a sustainable practice that conserves resources and reduces gardening costs, but it requires proper preparation including sterilization and replenishment of nutrients to ensure healthy growth for new plants. For specific guidance on garden soil, you might also find our article on “Reuse Vegetable Garden Soil In 2026? Expert Guide” helpful.
Assessing Soil for Reuse
Before deciding to reuse, evaluate the condition of your old potting soil.
- Healthy Soil: Soil from plants that thrived and showed no signs of disease or pest issues is an excellent candidate for reuse.
- Moderately Depleted Soil: Soil that held healthy plants but might be compacted or low on nutrients is ideal for recharging.
- Contaminated Soil (Discard): Do not reuse soil from plants that suffered from severe fungal diseases (like blight, fusarium wilt), serious root rot, or extensive pest infestations (e.g., fungus gnats, spider mites, mealybugs). These pathogens and pests can persist in the soil and infect new plants. If you’re unsure, it’s safer to discard it to prevent spreading issues.
- Herbicide/Pesticide Treated Soil: Avoid reusing soil if the previous plants were treated with systemic pesticides or herbicides that could leave residues harmful to new plantings.
How Do Professional Gardeners Clean and Refresh Used Soil?
Professional gardeners and nurseries often employ large-scale versions of home sterilization methods or opt for commercial soil steaming equipment to clean and refresh used soil. Beyond sterilization, they meticulously refresh soil by incorporating a precise blend of amendments designed to restore its structure, fertility, and microbial balance, often tailoring the mix to specific plant needs.
Professional Techniques
- Commercial Soil Steaming: Larger operations use specialized soil steamers that apply controlled moist heat to bulk quantities of soil. This method is highly effective for sterilization, reaching precise temperatures for optimal pathogen kill without damaging soil structure as much as dry heat might.
- Batch Composting: Instead of individual sterilization, some professionals integrate used potting soil into large-scale composting operations. The intense heat generated during active composting (thermophilic phase) can sterilize the soil naturally, while the composting process simultaneously enriches it with a diverse array of organic matter and beneficial microorganisms. This also aligns well with strategies like “Balcony Composting Without Annoying Neighbors: 2026 Guide” for urban gardeners.
- Strategic Amendment Blending: After sterilization or composting, professional gardeners meticulously blend the refreshed soil with a range of amendments:
- High-quality compost: Adds a broad spectrum of nutrients and improves soil structure.
- Perlite/Vermiculite: For aeration and moisture retention.
- Slow-release organic fertilizers: To provide a steady supply of nutrients.
- Mycorrhizal fungi inoculants: To enhance nutrient uptake for plants.
- pH adjusters: Lime or sulfur, based on the target crop’s needs, often determined by soil testing.
How Much Does it Cost to Sterilize Soil Compared to Buying New Bags?
Sterilizing and recharging used potting soil is significantly more cost-effective than consistently buying new bags, typically reducing expenses to a fraction of the cost of new commercial mixes. The primary costs involved are minimal: energy for heat treatment and the purchase of inexpensive organic amendments, contrasting sharply with the recurring expense of bagged soil which can range from $10-$30 per cubic foot.
Cost Breakdown
| Item/Method | Estimated Cost (per cubic foot, 2026) | Notes |
|---|---|---|
| New Potting Soil | $10 – $30 | Varies by brand, quality (e.g., organic, specialty mixes), and volume. |
| Oven Sterilization | $0.50 – $2.00 (electricity cost) | Based on electricity usage for an oven running for 1-2 hours. Minimal direct material cost. |
| Microwave Sterilization | $0.20 – $1.00 (electricity cost) | Lower energy for smaller batches. |
| Solarization | $0.10 – $0.50 (plastic sheet) | Largely free, requires only clear plastic sheeting, which can often be reused. |
| Organic Amendments | $2 – $8 (compost, perlite, fertilizer) | Cost of amendments like compost, perlite, vermiculite, and a balanced organic fertilizer. Bulk purchasing reduces cost. |
| Total for Reusing | $2.50 – $11.00 | Significantly less than new bags, especially over multiple growing seasons. |
- Savings: Over time, especially for gardeners with numerous containers, the savings from reusing soil can be substantial. For example, a gardener needing 5 cubic feet of soil per season could save $35-$100 by reusing instead of buying new.
- Environmental Benefit: Beyond monetary savings, reusing soil reduces plastic waste from bags and the environmental impact of manufacturing and transporting new soil mixes.
What Happens if I Don’t Sterilize Old Potting Soil Before Reusing?
If you don’t sterilize old potting soil before reusing it, you risk introducing various problems to your new plants, including recurring diseases, pest infestations, and competition from weed seeds. These issues can lead to stunted growth, plant death, and a continuous cycle of unhealthy garden conditions, making the effort to sterilize a worthwhile preventive measure.
Risks of Unsterilized Soil
- Disease Recurrence: Pathogens from previous diseased plants (fungi, bacteria, viruses) can remain dormant in the soil, readily infecting new seedlings or plants. This is particularly problematic with root-borne diseases.
- Pest Infestations: Larvae, eggs, or even adult forms of common soil pests (e.g., fungus gnats, root aphids, slug eggs) can survive in unsterilized soil, quickly emerging to damage new plants.
- Weed Seed Germination: Old potting soil often contains dormant weed seeds that will readily sprout once watered, competing with your desired plants for nutrients and light.
- Nutrient Imbalances: Without recharging, the soil will be depleted of essential nutrients, leading to weak plant growth regardless of sterilization. However, sterilization itself doesn’t address nutrient levels.
- Poor Plant Health: The cumulative effect of diseases, pests, and nutrient deficiencies will result in unhealthy, stressed plants that are more susceptible to further problems.
Which Plants Are Safe to Replant in Sterilized Soil and Which Aren’t?
Most plants are safe to replant in properly sterilized and recharged potting soil, especially those known for their resilience and general adaptability, such as many herbs, leafy greens, and common annual flowers. However, very sensitive seedlings, plants susceptible to specific soil-borne diseases, or high-value specimens might benefit from fresh, sterile potting mix to guarantee optimal conditions and minimize any residual risks.
Safe for Replanting
- Most Herbs: Basil, mint, rosemary, thyme, and oregano generally thrive in reused soil.
- Leafy Greens: Lettuce, spinach, kale, and other quick-growing greens do well.
- Common Annuals: Petunias, marigolds, impatiens, and geraniums are usually fine.
- Established Perennials: Once they are past their vulnerable seedling stage, many perennials can adapt.
- Vegetables: Many common vegetables like peppers, tomatoes, and beans (assuming no previous disease specific to these crops) will perform adequately. For optimal vegetable growth, ensure the soil is thoroughly enriched; our “Best Soil Mix For Vegetables: 2026 Guide To Thriving Garden” offers excellent insights into nutrient requirements.
Plants to Consider Using Fresh Soil For
- Very Sensitive Seedlings: Extremely delicate seedlings or those with slow germination rates may benefit from completely fresh, sterile seed-starting mix to give them the best possible start.
- Plants Prone to Specific Soil-Borne Diseases: If you had a previous issue with a specific disease (e.g., Fusarium wilt in tomatoes, damping-off in brassicas), even sterilized soil might carry an infinitesimal risk. For high-value crops or to prevent recurrence, new soil is safer.
- Orchids and Specialty Plants: These often require highly specific and consistently sterile substrates, making new, specialized mixes a better choice.
- High-Value or Rare Plants: For plants where failure is not an option, the peace of mind offered by fresh, high-quality soil may outweigh the cost savings of reuse.
Common Mistakes People Make When Trying to Recharge Potting Soil
One of the most common mistakes people make when trying to recharge potting soil is failing to sterilize it properly, which leaves harmful pathogens, pests, and weed seeds intact, negating much of the effort. Another significant error is neglecting to adequately replenish nutrients and organic matter, resulting in a lifeless, depleted medium that cannot support robust plant growth.
Pitfalls to Avoid
- Incomplete Sterilization:
- Not reaching target temperature: Failing to get the soil’s core temperature high enough (e.g., 180-200°F) or maintaining it for sufficient time.
- Over-filling containers: Packing soil too deep in pans prevents even heat distribution.
- Skipping moistening: Dry soil heats unevenly and doesn’t benefit from steam.
- Over-Sterilization:
- Too high a temperature or too long: This can destroy beneficial soil microbes and organic matter, creating a “dead” soil that lacks vitality. It can also produce noxious odors.
- Insufficient Nutrient Replenishment:
- Only adding a single amendment: Relying solely on compost without considering other essential nutrients or soil structure enhancers like perlite.
- Not adding enough: Adding too little amendment won’t significantly impact the soil’s fertility.
- Using chemical fertilizers immediately: Organic amendments and slow-release options are generally better for rebuilding soil health long-term.
- Using Heavily Contaminated Soil: Attempting to sterilize soil from plants that had severe, persistent diseases or pest issues is often a losing battle; some resilient spores or eggs may survive.
- Ignoring Soil Structure: Failing to add materials like perlite, vermiculite, or coarse sand to improve drainage and aeration, especially if the soil is compacted.
- Not Letting Soil “Rest”: Freshly sterilized soil can benefit from a few days to a week to allow some beneficial microbes to re-establish before planting.
How to Add Nutrients Back into Depleted Garden Soil
To add nutrients back into depleted garden soil, the most effective strategy is to generously incorporate organic matter, such as high-quality compost or aged manure, which slowly releases a broad spectrum of essential nutrients and significantly improves soil structure. Supplementing this with specific organic fertilizers can target any remaining nutrient deficiencies. For identifying issues, our “Spot Soil Nutrients Without A Test: Garden Guide 2026” can be a helpful resource.
Key Amendments and Their Benefits
- Compost:
- Description: Decomposed organic matter from kitchen scraps, yard waste, etc.
- Benefits: The backbone of soil rejuvenation. Provides a slow-release source of macro- and micronutrients, improves soil structure (aeration, drainage, water retention), and introduces beneficial microbial life.
- Application: Mix 1 part finished compost with 2-3 parts sterilized potting soil.
- Worm Castings (Vermicompost):
- Description: The byproduct of earthworms digesting organic material.
- Benefits: Exceptionally rich in nutrients, enzymes, and beneficial microbes. Enhances germination, plant growth, and disease resistance.
- Application: Add 10-20% worm castings by volume to your soil mix.
- Perlite or Vermiculite:
- Description: Lightweight, porous volcanic glass (perlite) or hydrous phyllosilicate mineral (vermiculite).
- Benefits: Primarily for improving drainage and aeration (perlite) or water retention and aeration (vermiculite). They don’t add significant nutrients but are vital for root health.
- Application: Add 10-20% by volume, depending on how heavy or compacted your original soil is.
- Organic Fertilizers:
- Description: Natural sources of nutrients like bone meal (phosphorus), blood meal (nitrogen), kelp meal (micronutrients, hormones), or alfalfa meal.
- Benefits: Provide targeted nutrient boosts. Bone meal for flowering/fruiting, blood meal for leafy growth. Kelp meal offers a holistic boost.
- Application: Follow package directions carefully. Integrate thoroughly into the soil mix. Consider a balanced organic granular fertilizer.
- Mycorrhizal Fungi Inoculants:
- Description: Beneficial fungi that form a symbiotic relationship with plant roots.
- Benefits: Greatly enhance the plant’s ability to absorb water and nutrients (especially phosphorus). Reintroduces beneficial biology to sterilized soil.
- Application: Mix into the soil or sprinkle into planting holes according to product instructions.
Step-by-Step Recharging Process
- Break Up Clumps: Loosen any compacted soil and remove large roots or debris.
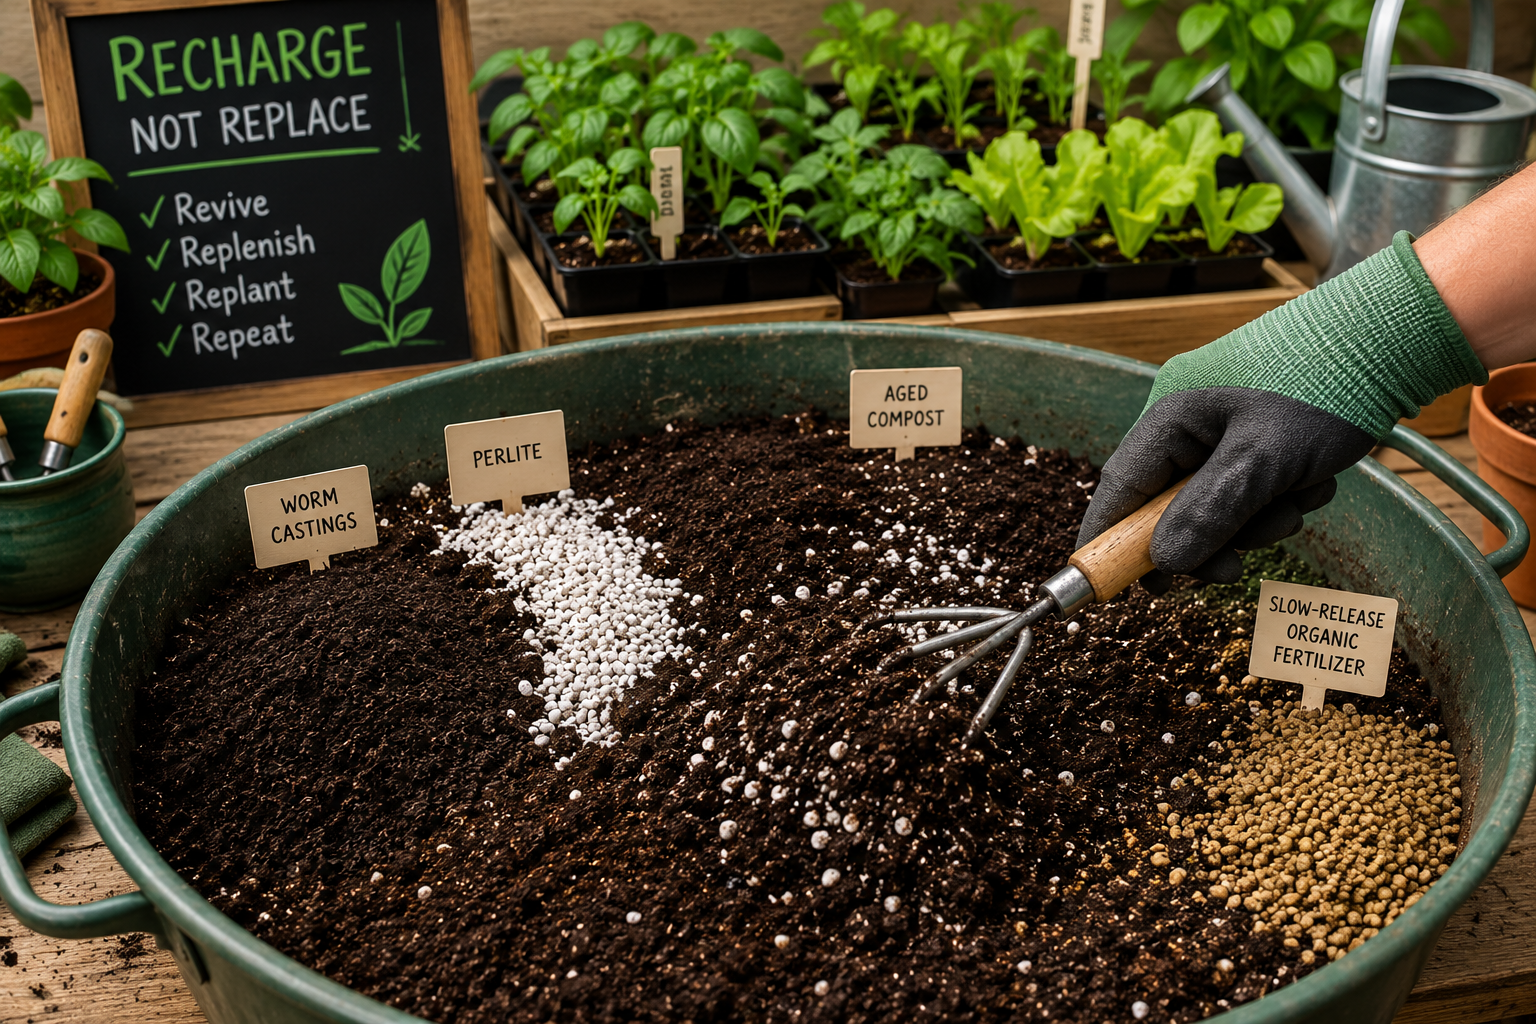
- Add Compost/Worm Castings: Start by thoroughly mixing in your primary organic amendments.
- Incorporate Aeration Aids: Add perlite or vermiculite, mixing well to ensure even distribution.
- Add Specific Fertilizers: If using, blend in granular organic fertilizers according to package instructions.
- Moisten and Rest: Lightly moisten the recharged soil and let it sit for a few days to a week. This allows the amendments to integrate and microbial activity to begin.
- Test pH (Optional but Recommended): Use a soil pH kit if you suspect a significant imbalance or are growing plants with specific pH requirements. Adjust with lime (to raise pH) or elemental sulfur (to lower pH) as needed.
Can I Use My Oven to Sterilize Potting Soil at Home?
Yes, you can effectively use your home oven to sterilize potting soil, making it a convenient method for eliminating pathogens, pests, and weed seeds from used soil. This process involves heating moist soil to a specific temperature for a set duration, transforming it into a safe medium for new plantings.
Oven Sterilization Checklist
| Step | Details |
|---|---|
| 1. Gather Soil | Collect used potting soil, removing large debris, old roots, and any obvious pests. Break up large clumps. |
| 2. Moisten Soil | Lightly dampen the soil. It should be moist to the touch but not waterlogged. This generates steam, which aids sterilization and prevents the soil from “baking” dry. |
| 3. Prepare Pans | Spread the moist soil into shallow, oven-safe baking pans or aluminum foil trays. The layer should be no more than 3-4 inches (7-10 cm) deep to ensure even heat penetration. |
| 4. Cover Tightly | Cover the pans securely with aluminum foil. This traps moisture, helping to create steam, and prevents odors from escaping into your kitchen. |
| 5. Preheat Oven | Set your oven to a low temperature, typically 180-200°F (82-93°C). Higher temperatures can harm beneficial microbes and organic matter, and create unpleasant odors. |
| 6. Insert Thermometer | For best results, insert a heat-safe meat thermometer into the center of the soil mass in one of the pans, ensuring it doesn’t touch the bottom of the pan. |
| 7. Bake Soil | Place the covered pans in the preheated oven. Once the internal soil temperature reaches 180°F (82°C), bake for at least 30 minutes. If you don’t have a thermometer, bake for 60-90 minutes at the lowest setting to be safe. |
| 8. Cool Slowly | Turn off the oven and let the soil pans cool completely inside the oven with the foil covers still on. This helps maintain sterility and prevents recontamination during cooling. Good ventilation is still recommended post-bake to dissipate any lingering smells. |
| 9. Store Safely | Once cool, transfer the sterilized soil to clean, airtight containers (e.g., bins with lids) until ready for use. Avoid exposing it to unsterilized soil or tools to prevent recontamination. |
What Tools Do I Need to Properly Clean and Recharge Soil?
To properly clean and recharge used potting soil, you typically need a few basic gardening tools and common household items, primarily for handling, sterilizing, and mixing. Specialized equipment isn’t necessary for small-scale home use, making the process accessible and affordable.
Essential Tools
- Large Container or Tarp: For collecting and mixing used soil. A wheelbarrow, large storage bin, or even a heavy-duty tarp on the ground works well.
- Trowel or Small Shovel: For scooping and breaking up compacted soil.
- Gardening Gloves: To protect your hands while working with soil and amendments.
- Sieve or Screen (Optional): A coarse mesh screen can be useful for sifting out large debris, old roots, or stubborn clumps, ensuring a finer, more uniform soil texture.
- Oven-Safe Baking Pans or Aluminum Foil Trays: For oven sterilization. Disposable aluminum pans are convenient.
- Aluminum Foil: To cover baking pans during oven sterilization, trapping moisture and heat.
- Heat-Safe Meat Thermometer (Recommended): Crucial for accurately monitoring the internal temperature of the soil during oven sterilization to ensure proper pathogen kill without over-baking.
- Measuring Cups/Scoops: For accurately adding amendments like compost, perlite, and fertilizers.
- Watering Can or Spray Bottle: To moisten the soil before sterilization and during the recharging process.
- Airtight Storage Bins: For storing sterilized and recharged soil until use, preventing recontamination.
Is It Worth Sterilizing Soil or Should I Just Buy New?
Sterilizing and recharging used potting soil is absolutely worth the effort for most home gardeners, primarily because it offers significant cost savings and promotes environmental sustainability. While buying new soil is simpler, the long-term benefits of soil rejuvenation—reducing waste, preserving resources, and cutting expenses—far outweigh the minimal time investment required for sterilization.
Weighing the Pros and Cons
| Feature | Sterilizing & Recharging Used Soil | Buying New Potting Soil |
|---|---|---|
| Cost | Low initial cost for amendments (compost, perlite), minimal energy cost. Significant long-term savings. | High recurring cost. |
| Sustainability | Environmentally friendly, reduces waste (plastic bags, discarded soil). Minimizes resource extraction. | Higher environmental footprint (manufacturing, transport, plastic waste). |
| Effort/Time | Requires manual labor for sifting, sterilizing, and mixing amendments. | Minimal effort; simply open a bag and use. |
| Quality Control | You control the exact composition and amendments, tailoring it to your plants. | Relies on manufacturer’s quality; sometimes inconsistent. |
| Disease/Pest Risk | Virtually eliminated with proper sterilization; reintroduces beneficial microbes with amendments. | Minimal risk initially, but depends on source quality and handling. |
| Learning/Skill | Teaches valuable lessons about soil health and composition. | No learning curve. |
| Accessibility | Requires basic kitchen equipment and gardening tools. | Readily available at garden centers. |
| Odor | Can produce mild, earthy odors during oven sterilization. | Generally odorless. |
When to Buy New Soil: If you have limited time, dislike the process, or dealt with a severe, unmanageable disease/pest outbreak in your previous plants, buying new soil might be a more practical choice. However, for most gardening scenarios, especially for container gardening or small raised beds, soil reuse is highly recommended. For those new to containers, our “Container Gardening For Beginners: Step-by-Step Guide 2026” offers a great starting point for understanding soil needs.
How Often Can You Reuse and Sterilize the Same Potting Soil?
You can generally reuse and sterilize the same potting soil for multiple growing seasons, often up to 2-3 times, provided it maintains good structure and is consistently replenished with organic matter. However, the exact number of reuses depends on the soil’s initial quality, the plants grown, and the thoroughness of your recharging process, as over time, even well-maintained soil can degrade.
Factors Affecting Reusability
- Organic Matter Content: Each sterilization cycle can degrade some organic matter. Regular replenishment with high-quality compost and other organic amendments is essential to maintain fertility and structure.
- Structural Integrity: Over time, the soil’s structure can break down, leading to compaction and poor drainage. If the soil becomes overly dense, drains poorly even after adding perlite, or turns excessively fine and dusty, it’s nearing the end of its useful life for container gardening.
- Previous Plant Health: Soil from plants with recurrent or severe issues should be discarded sooner rather than risking continuous problems.
- Sterilization Method: While effective, repeated high-heat sterilization can impact the soil’s long-term vitality if not carefully done. Solarization or careful oven use is key.
- Contamination Level: While sterilization kills most pathogens, some resilient spores or residual chemical contaminants might build up with repeated reuse, especially if the source material was questionable.
What Signs Mean My Potting Soil is Too Contaminated to Reuse?
Your potting soil is likely too contaminated to reuse if it exhibits persistent strong, foul odors, significant visual evidence of widespread disease (e.g., fungal mats, persistent mildew, dead root systems indicating severe root rot), or active, recurring pest infestations even after previous attempts at control. In such cases, the risk of transferring issues to new plants outweighs the benefits of reuse.
Clear Indicators to Discard Soil
- Strong, Persistent Foul Odor: Healthy soil has an earthy smell. If your soil consistently smells sour, rotten, or like sulfur, it indicates anaerobic conditions or severe bacterial decomposition, often signaling harmful microbial activity.
- Widespread Fungal Growth: Visible white, gray, or black fungal mats on the surface or throughout the soil, especially if associated with diseased plants (e.g., damping-off, fusarium wilt). While some harmless fungi exist, extensive growth warrants caution.
- Root Rot: If the previous plant’s roots were slimy, black, and easily pulled apart, indicating severe root rot, the soil is heavily contaminated with root-rotting pathogens.
- Active Pest Infestation: If the soil is visibly crawling with pests (e.g., active colonies of fungus gnats, mealybugs in the root ball, spider mites) even after attempts to treat the previous plant, these pests or their eggs are deeply entrenched.
- Persistent Plant Health Issues: If plants consistently failed or suffered from the same unidentifiable disease in the soil, despite good care, the soil itself might be the culprit.
- Excessive Compaction/Degradation: While not contamination, if the soil is severely compacted, turns to a fine dust, or completely loses its structure, even recharging might not restore its physical properties enough for healthy plant growth.
- Chemical Contamination: If you inadvertently used strong, non-organic pesticides, herbicides, or other chemicals that could leave persistent residues, discard the soil.
Conclusion
Reusing and recharging used potting soil is a highly practical, environmentally responsible, and economical practice for any gardener in 2026. By effectively sterilizing old soil, you eliminate lurking pathogens, pests, and weed seeds, ensuring a clean slate for new plants. Subsequently, enriching this sterile medium with organic amendments restores its vital nutrients and improves its structure, providing a fertile ground for robust growth. While not every batch of soil is salvageable, understanding the signs of irreversible contamination and avoiding common mistakes will empower you to save money, reduce waste, and cultivate a healthier, more sustainable garden. Embrace the cycle of reuse; your plants, your wallet, and the planet will thank you.
Next Steps:
- Assess Your Current Soil: Before beginning, thoroughly inspect your used potting soil for signs of heavy disease or pest infestation.
- Choose a Sterilization Method: Select the method (oven, microwave, or solarization) that best suits your batch size and available resources.
- Gather Your Amendments: Purchase or prepare organic materials like compost, worm castings, perlite, and a balanced organic fertilizer.
- Sterilize and Recharge: Follow the steps outlined in this guide to sterilize and then enrich your soil.
- Store Properly: Keep your freshly prepared soil in clean, airtight containers until you’re ready to plant.
Related Reading
- Best Soil Mix For Container Gardening (Complete Guide)
- Spot Soil Nutrients Without A Test: Garden Guide 2026
- Reuse Vegetable Garden Soil In 2026? Expert Guide
- Organic Vegetable Gardening 2026: Your Complete Guide To Gr
- Container Gardening For Beginners: Step-by-Step Guide 2026
FAQ
Q: Can I just add compost to old soil without sterilizing?
A: While adding compost is excellent for nutrients, it doesn’t eliminate pathogens, pests, or weed seeds, which sterilization does. It’s risky without prior sterilization.
Q: What is the ideal temperature for sterilizing potting soil in an oven?
A: The ideal internal soil temperature is 180-200°F (82-93°C), maintained for at least 30 minutes.
Q: Will sterilizing soil kill all beneficial microbes?
A: Yes, high-heat sterilization will kill most beneficial microbes along with harmful ones. That’s why reintroducing organic matter like compost and worm castings, or even mycorrhizal inoculants, is crucial after sterilization.
Q: How do I prevent recontamination of sterilized soil?
A: Store sterilized soil in clean, airtight containers, use clean tools, and avoid mixing it with unsterilized soil or debris.
Q: Can I sterilize soil that had fungus gnats?
A: Yes, sterilization methods like oven baking or solarization are effective at killing fungus gnat larvae and eggs, making the soil safe for reuse.
Q: What if my soil still smells bad after sterilization?
A: A persistent foul odor after sterilization might indicate improper heating or that the organic matter was too degraded. If the smell persists, it might be safer to discard that batch.
Q: Is solarizing effective in cooler climates?
A: Solarization is most effective in hot, sunny climates (e.g., USDA zones 8 and above) with consistent temperatures above 80°F (27°C). It may not reach lethal temperatures in cooler regions.
Q: How do I know if my soil is adequately recharged?
A: Adequately recharged soil should have a dark, crumbly texture, drain well, hold moisture without being waterlogged, and smell earthy. Healthy plant growth in the soil is the ultimate indicator.