When should I start fertilizing vegetable seedlings?
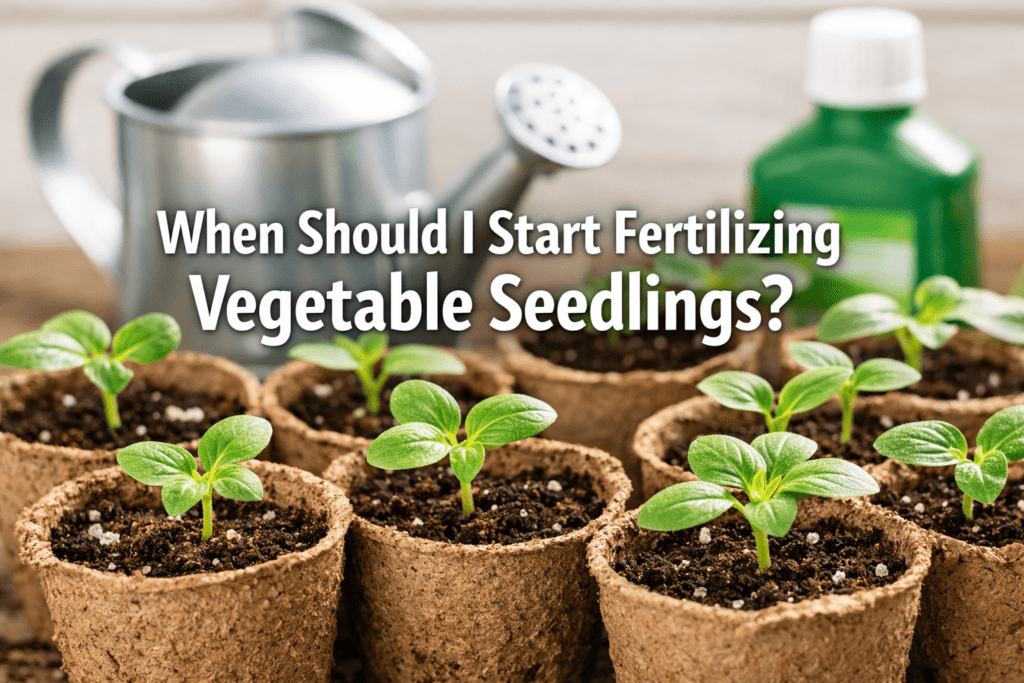
Embarking on the journey of growing vegetables from seed is incredibly rewarding, yet it comes with specific care requirements that can make or break your success. A common question that arises for both new and seasoned gardeners is: When should I start fertilizing vegetable seedlings? Providing nutrients at the right time and in the correct amount is crucial for robust growth, setting your plants up for a bountiful harvest. Improper fertilization, either too early or too much, can harm delicate young plants, while waiting too long can stunt their development. This guide will clarify the optimal timing and methods for fertilizing your vegetable seedlings in 2026.
Key Takeaways
- Wait for True Leaves: Begin fertilizing when seedlings develop 4-6 true leaves, typically 5-6 weeks after germination.
- Initial Potting Mix Nutrients: Most commercial seed-starting mixes contain enough nutrients for the first several weeks of growth [8].
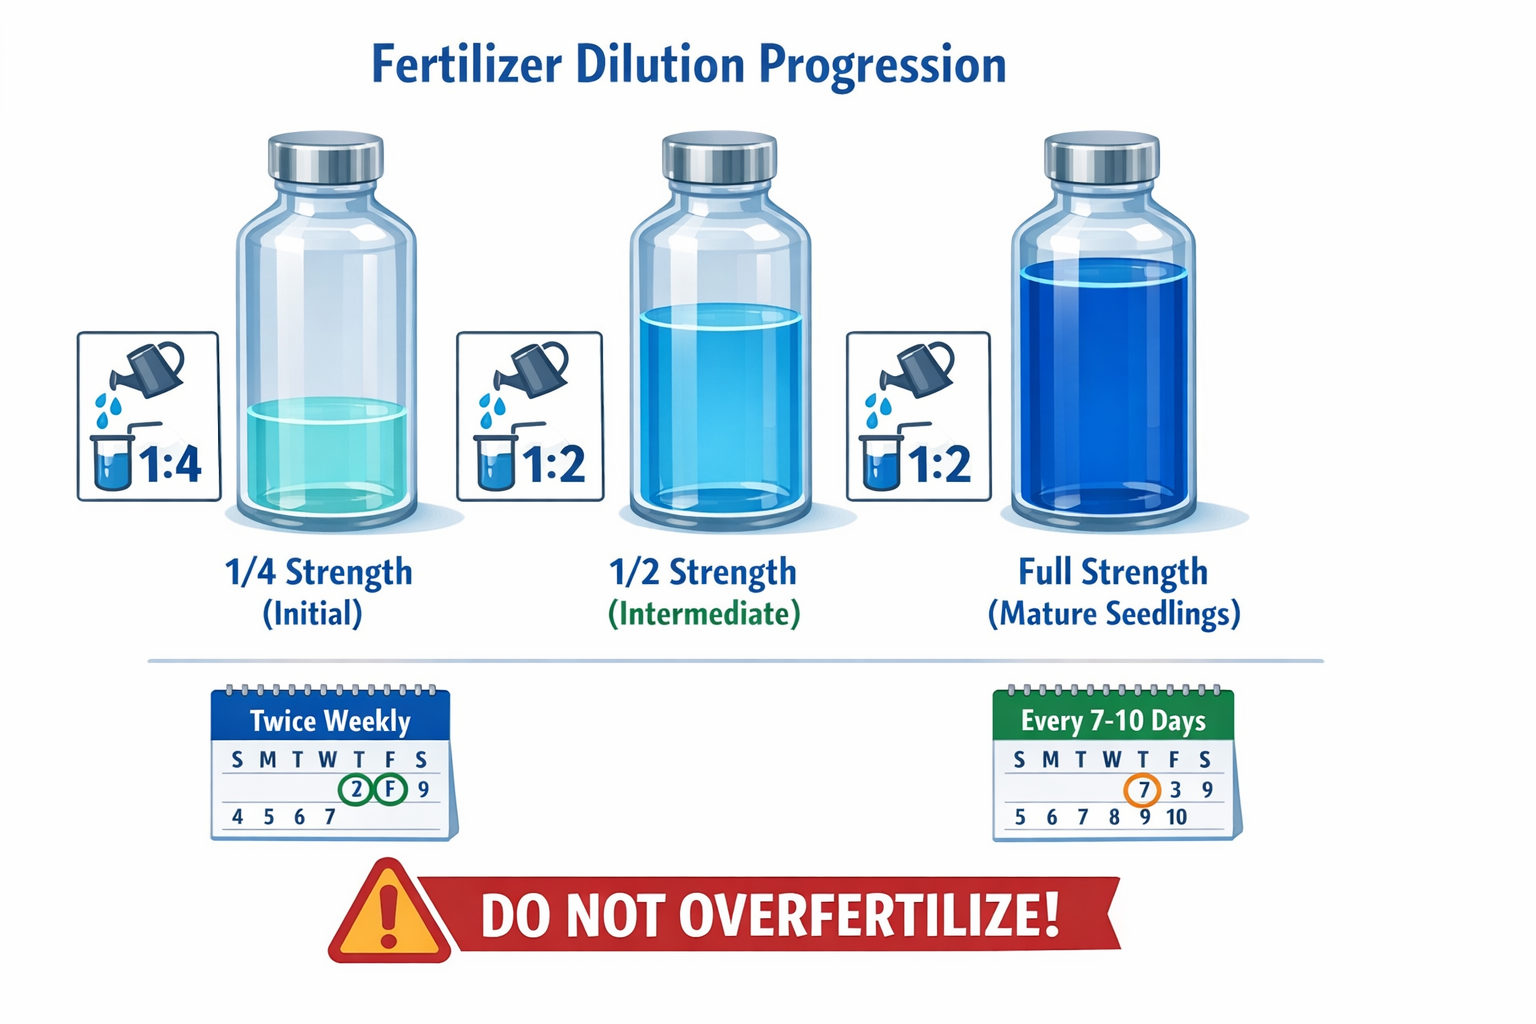
- Dilute Heavily: Start with liquid fertilizer diluted to one-quarter (1/4) of the manufacturer’s recommended strength [4].
- Frequency: Apply diluted fertilizer twice weekly initially, then reduce to every 7-10 days as concentration increases [4].
- Observe Seedlings: Fertilize only healthy, unstressed seedlings; ensure adequate light, water, and temperature first [4].
- Gradual Increase: Slowly increase fertilizer concentration to half (1/2) strength, then full strength as seedlings mature [4].
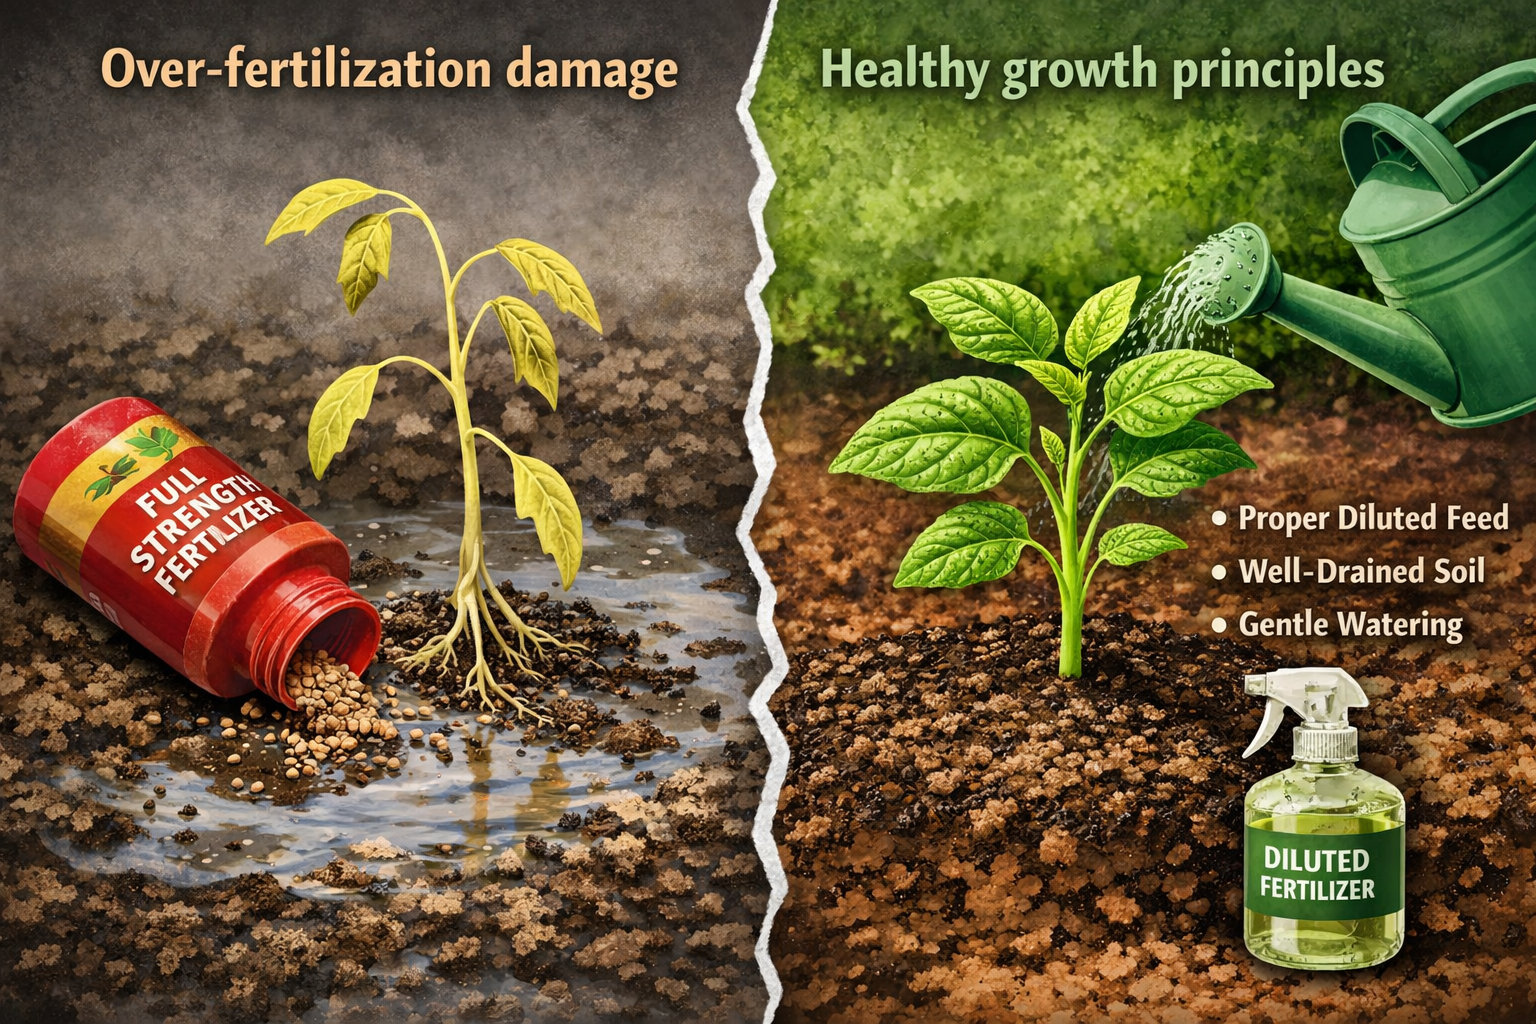
- Less is More: Over-fertilization can cause severe damage, so always err on the side of caution with young plants [4].
- Type of Fertilizer: Opt for balanced liquid fertilizers, or those slightly higher in nitrogen for leafy growth.
- Prepare for Transplant: Transition to full-strength fertilizer as seedlings harden off before moving to the garden.
Quick Answer
You should start fertilizing vegetable seedlings when they have developed 4-6 true leaves, which usually occurs about 5-6 weeks after germination [4, 6]. Most commercial seed-starting mixes are designed to provide sufficient nutrients for this initial growth period, making early fertilization unnecessary and potentially harmful [8]. Begin with a very dilute liquid fertilizer and gradually increase its strength as the seedlings mature and grow stronger.
Why Fertilizing Too Early Harms Seedlings
Starting your seedlings in the right way is paramount, and understanding their nutritional needs is a key part of that. Fertilizing vegetable seedlings too early, particularly before they develop true leaves, can cause significant damage because their delicate root systems are not yet equipped to handle concentrated nutrients. Seed-starting mixes typically contain enough nutrients to support germination and the development of cotyledons (the first, embryonic leaves) and a few true leaves [8]. Adding external fertilizer during this initial stage can lead to nutrient burn, where the roots are damaged by excessive salt concentration, hindering water absorption.
Instead of rushing to fertilize, focus on providing optimal growing conditions:
- Adequate Light: Ensure seedlings receive 12-16 hours of bright light daily, either from a south-facing window or, preferably, artificial grow lights to prevent legginess.
- Proper Moisture: Keep the potting mix consistently moist but not waterlogged. Allowing the soil to dry out slightly between waterings encourages root development. For guidance, refer to our Ultimate Guide: How Often Should You Water Plants?.
- Optimal Temperature: Maintain appropriate temperatures for the specific vegetable variety. Most warm-season vegetables prefer temperatures between 65-75°F (18-24°C) during the day and slightly cooler at night.
- Good Air Circulation: Gentle air movement, perhaps from a small fan, strengthens stems and helps prevent fungal diseases.
When Should I Start Fertilizing Vegetable Seedlings? The True Leaf Stage
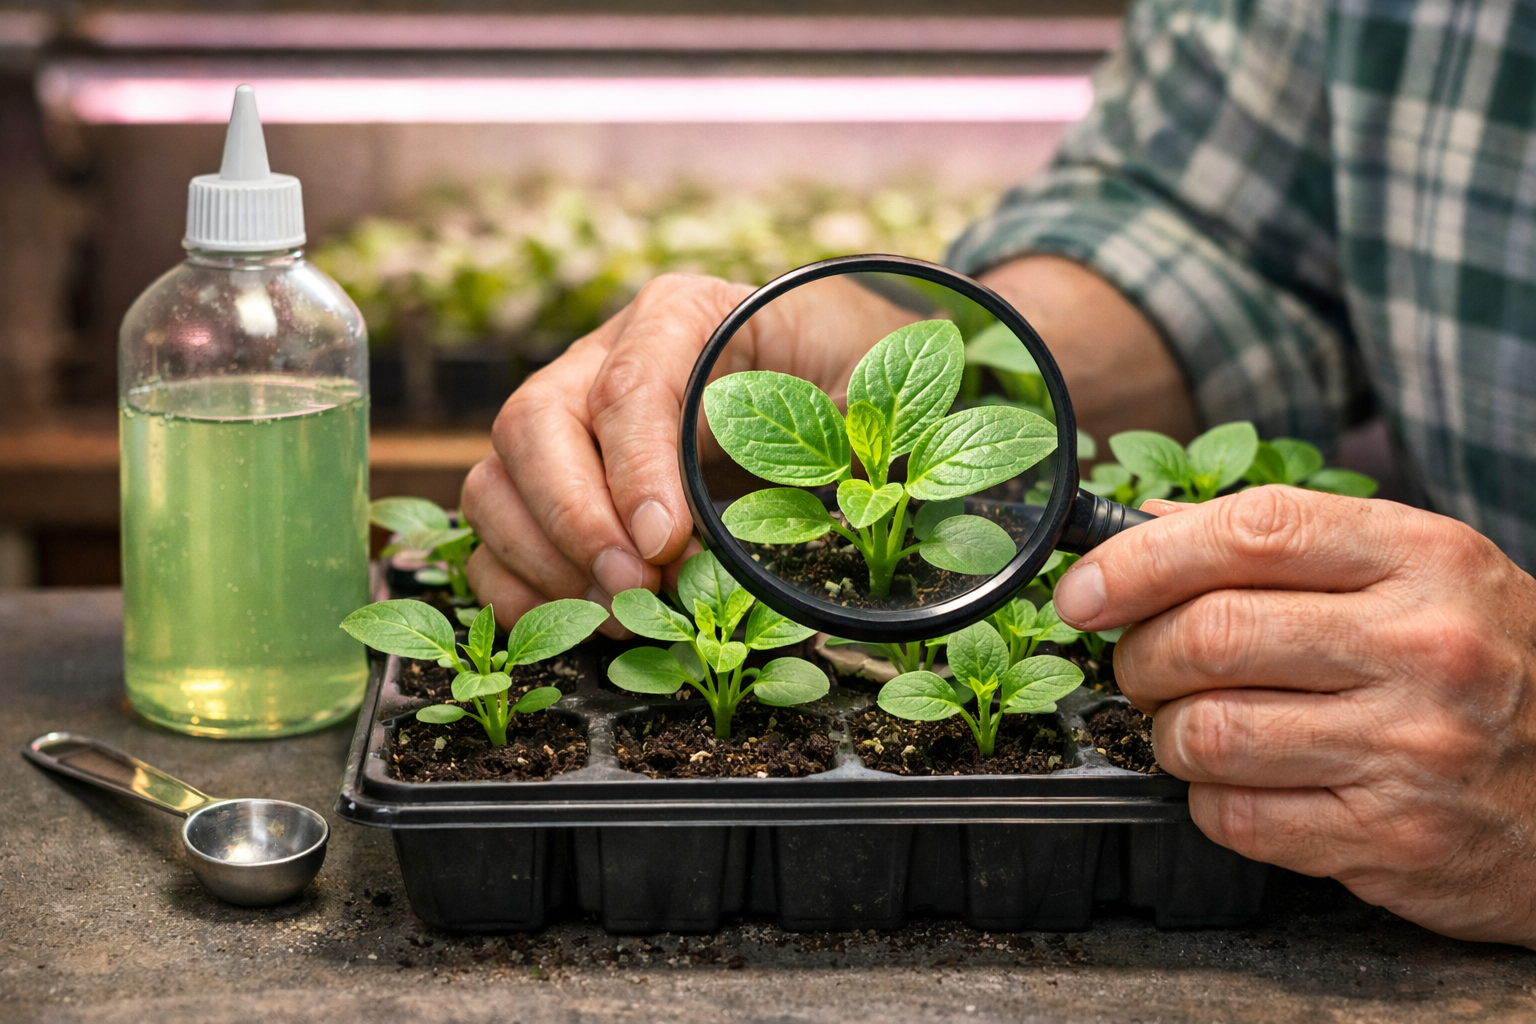
The definitive sign that your vegetable seedlings are ready for their first dose of fertilizer is the appearance of their true leaves. Specifically, you should start fertilizing when the seedlings have developed 4-6 true leaves [4, 6]. The first pair of leaves that emerge, known as cotyledons, are embryonic leaves that contain stored food from the seed and are not true leaves in terms of photosynthesis and nutrient absorption [8]. True leaves, which appear after the cotyledons, are typically shaped like miniature versions of the mature plant’s leaves and indicate the plant has begun active photosynthesis and can process external nutrients more effectively [6].
Identifying True Leaves
- Cotyledons: Often rounded or oval, these are the first leaves to emerge, sometimes looking quite different from the plant’s mature leaves. They provide initial nourishment.
- True Leaves: These emerge after the cotyledons and will have the characteristic shape and texture of the adult plant’s leaves. They signal that the seedling is actively growing and requires more external nutrients for continued development.
Waiting for the true leaf stage ensures that the seedling has developed a sufficiently robust root system to absorb and utilize the added nutrients without experiencing burn or stress. This critical timing prevents common beginner mistakes in small space gardening https://minispacegarden.com/beginner-mistakes-in-small-space-gardening/.
How to Fertilize Vegetable Seedlings: Dilution and Application
When you’re ready to start fertilizing vegetable seedlings, the key is to begin with a heavily diluted solution and apply it carefully. Young seedlings are very sensitive, and over-fertilization can quickly lead to damage [4]. The general approach involves starting with a weak liquid fertilizer solution and gradually increasing its strength as the plants mature.
Step-by-Step Fertilization Guide
- Choose the Right Fertilizer: Select a balanced liquid fertilizer (e.g., 5-5-5 or 10-10-10 NPK) or one slightly higher in nitrogen for leafy green development. Organic options like fish emulsion or kelp meal can also be excellent choices.
- Initial Dilution (1/4 Strength): For the first few applications, dilute the liquid fertilizer to one-quarter (1/4) of the strength recommended by the manufacturer on the product label [4]. For example, if the label suggests 1 tablespoon per gallon, use only 1/4 tablespoon per gallon.
- Application Method:
- Water the seedlings lightly with plain water before applying the fertilizer solution. This helps prevent root burn on dry roots.
- Apply the diluted fertilizer solution gently around the base of each seedling, ensuring not to splash too much on the foliage. A small watering can with a fine rose or a syringe can be useful for precision in small spaces.
- Avoid saturating the soil; just enough to moisten it thoroughly.
- Frequency (Initial Phase): During the initial phase, with the 1/4 strength solution, apply fertilizer about twice a week [4]. This frequent, dilute feeding provides a steady supply of nutrients without overwhelming the young plants.
- Gradual Increase (1/2 Strength): After about two weeks of 1/4 strength applications, or if seedlings show vigorous growth, gradually increase the dilution to one-half (1/2) of the manufacturer’s recommended strength [4]. At this concentration, you can reduce the frequency to once every 7-10 days.
- Full Strength (Before Transplant): As seedlings approach transplanting size and are being hardened off, you can transition to the full recommended strength of the fertilizer, applied every 7-10 days [4]. This prepares them for the nutrient demands of the garden soil. For tips on managing your space, check out our Ultimate Guide to Small Space Gardening for Beginners 2026.
Common Mistakes to Avoid
- Over-fertilization: This is the most common mistake. Too much fertilizer too soon can burn roots and foliage, leading to stunted growth or even death [4]. Signs include yellowing leaf tips, browning edges, or wilting.
- Fertilizing Dry Soil: Always water plants before fertilizing. Applying fertilizer to dry soil can concentrate salts and damage roots.
- Ignoring Plant Health: Never fertilize stressed seedlings (e.g., those with insufficient light, water, or temperature issues). Address environmental stressors first, then fertilize healthy plants [4].
- Using Granular Fertilizers: Stick to liquid fertilizers for seedlings. Granular fertilizers are harder to control in terms of dosage and can burn delicate roots.
By following these guidelines, you provide your vegetable seedlings with the necessary nutrients for healthy development, ensuring they are strong and ready for planting in their permanent garden home, whether it’s a mini garden at home or a larger plot.
Choosing the Right Fertilizer for Young Vegetable Seedlings
Selecting an appropriate fertilizer is critical when you start fertilizing vegetable seedlings, as their nutritional needs are specific and their systems are still delicate. The best choices are typically balanced, water-soluble liquid fertilizers that offer a gentle yet effective nutrient boost.
Types of Fertilizers to Consider
- Balanced Liquid Fertilizers: Look for fertilizers with an N-P-K (Nitrogen-Phosphorus-Potassium) ratio that is relatively balanced, such as 5-5-5, 10-10-10, or similar. Nitrogen promotes leafy growth, phosphorus supports root development, and potassium aids overall plant health and resilience.
- Organic Liquid Fertilizers: Options like fish emulsion, kelp meal, or compost tea are excellent organic choices.
- Fish Emulsion: Provides nitrogen and other micronutrients, promoting strong foliage. It can have a strong odor, so it’s often preferred for outdoor seedlings or well-ventilated indoor spaces.
- Kelp Meal (Liquid): Rich in micronutrients and growth hormones, it enhances overall plant vigor and stress resistance.
- Compost Tea: A natural, mild option that introduces beneficial microbes along with nutrients, improving soil health.
- Starter Solutions: Some products are specifically formulated as “starter solutions” for young plants, often having slightly higher phosphorus content to encourage root development. Always check the N-P-K ratio and dilute these as well.
What to Avoid
- High-Nitrogen Fertilizers: While nitrogen is important for green growth, excessively high-nitrogen fertilizers can cause rapid, leggy growth that is weak and susceptible to disease. Balance is key.
- Granular Fertilizers: These are generally unsuitable for seedlings. They release nutrients slowly and unevenly, making it difficult to control the dosage, which can easily lead to root burn in young plants. They are better suited for established plants in garden beds [3].
- “Weed and Feed” Products: These contain herbicides that will kill your vegetable seedlings. Ensure any fertilizer you use is specifically for edible plants or general plant growth, without added weed killers.
When making your choice, always read the label carefully for N-P-K ratios, application instructions, and any specific warnings. Even with a suitable fertilizer, the principle remains: less is better than more for young seedlings [4]. For maximizing growth in constrained spaces, using the right fertilizers and soil basics are crucial for container gardening https://minispacegarden.com/soil-basics-for-container-gardening/.
Signs of Nutrient Deficiency vs. Over-fertilization
Recognizing whether your vegetable seedlings are underfed or overfed is crucial for timely intervention. Both conditions can manifest with similar symptoms, but careful observation can help distinguish between them.
Signs of Nutrient Deficiency
If your seedlings are showing these signs after developing true leaves and you haven’t fertilized, or have used extremely diluted solutions, they might be lacking nutrients:
- Pale or Yellowing Leaves (Chlorosis): Often the earliest sign. General yellowing, especially in older leaves, can indicate a nitrogen deficiency, as nitrogen is mobile and moves to new growth [2].
- Stunted Growth: Overall slow growth, smaller than expected leaves, or weak stems, despite adequate light and water.
- Purple or Reddish Tints: Particularly on the undersides of leaves or along stems, this can indicate a phosphorus deficiency, especially in cooler temperatures [7].
- Lack of Vigor: Plants look generally unhealthy, limp, or struggle to grow beyond a certain point.
Action: If you suspect nutrient deficiency, begin or increase the frequency of your diluted liquid fertilizer applications (e.g., from once a week to twice a week, or from 1/4 strength to 1/2 strength).
Signs of Over-fertilization (Nutrient Burn)
Over-fertilization is often more damaging to seedlings than under-fertilization. It occurs when too much fertilizer or a solution that is too strong damages the roots and leaves [4].
- Brown or Crispy Leaf Tips/Edges: This is a classic symptom of nutrient burn, where the excess salts draw water out of the plant cells.
- Wilting, Even with Moist Soil: Roots damaged by excessive fertilizer cannot absorb water effectively, leading to wilting.
- Stunted Growth or Sudden Collapse: Instead of promoting growth, too much fertilizer can halt it or cause the seedling to shrivel and die.
- White Crust on Soil Surface: This indicates a buildup of fertilizer salts.
Action: If you suspect over-fertilization:
- Flush the Soil: Gently water the seedling’s soil thoroughly with plain, clean water. Allow the water to drain out completely. This helps wash away excess salts. Repeat this process a few times over a day.
- Stop Fertilizing: Immediately cease all fertilizer applications for at least 1-2 weeks.
- Monitor: Observe the plant for signs of recovery. If new growth appears healthy, resume fertilization at a much weaker dilution.
By understanding these distinctions, you can respond appropriately to your seedlings’ needs, fostering strong and healthy growth. Regularly checking on your plants is part of good beginner plant care https://minispacegarden.com/beginners-guide-to-plant-care/.
Transitioning Fertilization for Transplanting Vegetable Seedlings
As your vegetable seedlings mature and approach the time for transplanting into a larger container or the outdoor garden, their nutritional needs will increase. Adjusting your fertilization schedule and concentration in preparation for this move is a crucial step in ensuring a smooth transition and continued robust growth. This process is often part of “hardening off” the plants, which also involves acclimating them to outdoor conditions.
Fertilization Schedule Leading Up to Transplant
- Increase Concentration Gradually: If you’ve been using 1/4 or 1/2 strength fertilizer, gradually transition to the full recommended strength of your liquid fertilizer about 1-2 weeks before the planned transplant date [4]. This helps the seedlings build up nutrient reserves.
- Maintain Frequency: Continue to fertilize every 7-10 days with the full-strength solution [4].
- Monitor Plant Response: Watch for any signs of stress. If the plants show signs of nutrient burn (crispy leaf tips, wilting), reduce the concentration slightly or flush the soil.
- Hardening Off: Simultaneously with increasing fertilizer, begin the hardening off process. This involves gradually exposing seedlings to outdoor conditions (sun, wind, cooler temperatures) over 7-14 days. During this period, ensure the soil remains adequately moist, as plants can dry out more quickly outdoors.
Post-Transplant Fertilization
Once transplanted into the garden or larger pots, your plants will have access to a larger volume of soil and its inherent nutrients.
- Initial Post-Transplant: Avoid immediate fertilization right after transplanting. Give the plants a week or two to settle and establish new roots in their new environment. Watering thoroughly after transplanting is generally sufficient initially.
- Garden Soil Preparation: If you’ve amended your garden beds with compost or a slow-release granular fertilizer before planting, your plants may not need additional liquid feeding for several weeks [1, 5].
- First Garden Feeding: After a couple of weeks post-transplant, you can resume a regular fertilization schedule tailored to the specific vegetable and its growth stage (e.g., more nitrogen for leafy greens, more phosphorus/potassium for fruiting vegetables when they begin to flower and set fruit) [1, 3].
- Container Gardening: For vegetables grown in containers, ongoing fertilization is essential, as nutrients leach out more quickly than in garden beds. Begin regular feeding about 1-2 weeks after transplanting into their final containers, following the product’s recommendations for mature plants [2]. Using the best pots for small space gardening can also help maintain nutrient levels and plant health [https://minispacegarden.com/best-pots-for-small-space-gardening/].
By systematically adjusting your fertilization practices, you ensure your vegetable seedlings are strong, healthy, and ready to thrive as they grow into productive plants. This thoughtful approach supports successful vegetable gardening [https://minispacegarden.com/category/vegetable-gardening/].
FAQ: When Should I Start Fertilizing Vegetable Seedlings?
Q1: How soon can I fertilize my vegetable seedlings after they germinate?
You should wait until your vegetable seedlings have developed 4-6 true leaves, which typically occurs about 5-6 weeks after germination [4, 6].
Q2: What are “true leaves” and why are they important for fertilization timing?
True leaves are the second set of leaves that emerge after the initial cotyledons, and they resemble the mature plant’s leaves. They signal that the seedling has developed a root system capable of absorbing external nutrients effectively [6].
Q3: What kind of fertilizer is best for young vegetable seedlings?
A balanced, water-soluble liquid fertilizer, such as a 5-5-5 or 10-10-10 NPK ratio, or organic options like diluted fish emulsion or kelp meal, are best. Avoid granular fertilizers [4].
Q4: How much fertilizer should I use for my seedlings initially?
Start with liquid fertilizer diluted to one-quarter (1/4) of the strength recommended by the manufacturer [4].
Q5: How often should I fertilize my seedlings at the beginning?
Initially, when using the 1/4 strength solution, apply fertilizer twice a week [4]. As the concentration increases, reduce the frequency to every 7-10 days.
Q6: What happens if I fertilize my seedlings too early or use too much?
Fertilizing too early or with too high a concentration can cause nutrient burn, damaging the roots and leaves, leading to stunted growth, wilting, or even death [4].
Q7: My seedlings are turning yellow. Does this mean they need fertilizer?
Yellowing can indicate a nutrient deficiency, especially in older leaves (often nitrogen). However, it can also be a sign of overwatering, under-watering, or insufficient light. Ensure environmental conditions are optimal before increasing fertilizer [2].
Q8: Should I fertilize seedlings that look stressed or unhealthy?
No, avoid fertilizing stressed seedlings. First, address any environmental issues like inadequate light, improper watering, or unsuitable temperatures. Fertilize only healthy, unstressed plants [4].
Q9: When should I increase the fertilizer strength for my seedlings?
Gradually increase the fertilizer strength to half (1/2) the recommended dose after a couple of weeks of 1/4 strength applications, or as seedlings show vigorous growth. Move to full strength just before transplanting [4].
Q10: Do all seed-starting mixes need fertilizer right away?
No, most commercial seed-starting mixes contain enough nutrients to support seedling growth for the first 5-6 weeks, making immediate fertilization unnecessary [8].
Q11: How does fertilizing seedlings differ for container gardening versus ground planting?
For container gardening, ongoing fertilization is more critical because nutrients leach out of pots more quickly. For ground planting, initial soil amendments and less frequent feeding might be sufficient after transplanting [2, 5].
Q12: Is compost tea a good fertilizer for seedlings?
Yes, diluted compost tea can be a good mild organic fertilizer for seedlings, providing nutrients and beneficial microbes. Ensure it’s well-filtered to avoid clogging sprayers or leaving residue.
Conclusion
Mastering the art of fertilizing vegetable seedlings is a pivotal step towards a successful harvest in 2026. The most crucial takeaway is patience: wait until your seedlings have developed 4-6 true leaves before introducing any external nutrients. Remember that most seed-starting mixes provide sufficient nourishment for the initial weeks, making early fertilization detrimental rather than beneficial [8].
When you do begin, prioritize dilution. Start with a liquid fertilizer at just one-quarter of the recommended strength, applying it gently twice a week [4]. As your seedlings grow stronger and approach transplanting size, gradually increase the concentration to half, then full strength, while reducing the frequency to every 7-10 days. Always choose a balanced liquid fertilizer and never fertilize stressed plants. By observing your seedlings closely and adhering to these careful, incremental steps, you’ll cultivate robust, healthy plants ready to thrive in your garden, whether it’s a small space vegetable garden or a larger plot. Happy gardening!
References
[1] Creating A Fertilizer Schedule When And How To Fertilize Your Vegetable Garden – https://www.burpee.com/blog/creating-a-fertilizer-schedule-when-and-how-to-fertilize-your-vegetable-garden.html
[2] G6950 – https://extension.missouri.edu/publications/g6950
[3] Gardening When To Fertilize Your Garden – https://www.dripworks.com/blog/gardening-when-to-fertilize-your-garden
[4] How To Fertilize Seedlings – https://www.promixgardening.com/en-us/tips/how-to-fertilize-seedlings
[5] Fertilizing Vegetable Gardens Fact Sheet – https://extension.unh.edu/resource/fertilizing-vegetable-gardens-fact-sheet
[6] When And How To Fertilize Young Seedlings – https://thedallasgarden.com/when-and-how-to-fertilize-young-seedlings/
[7] Fs626 – https://njaes.rutgers.edu/FS626/
[8] Care Vegetable Seedlings – https://extension.umd.edu/resource/care-vegetable-seedlings