How can I start gardening in a dorm room on a tight budget?
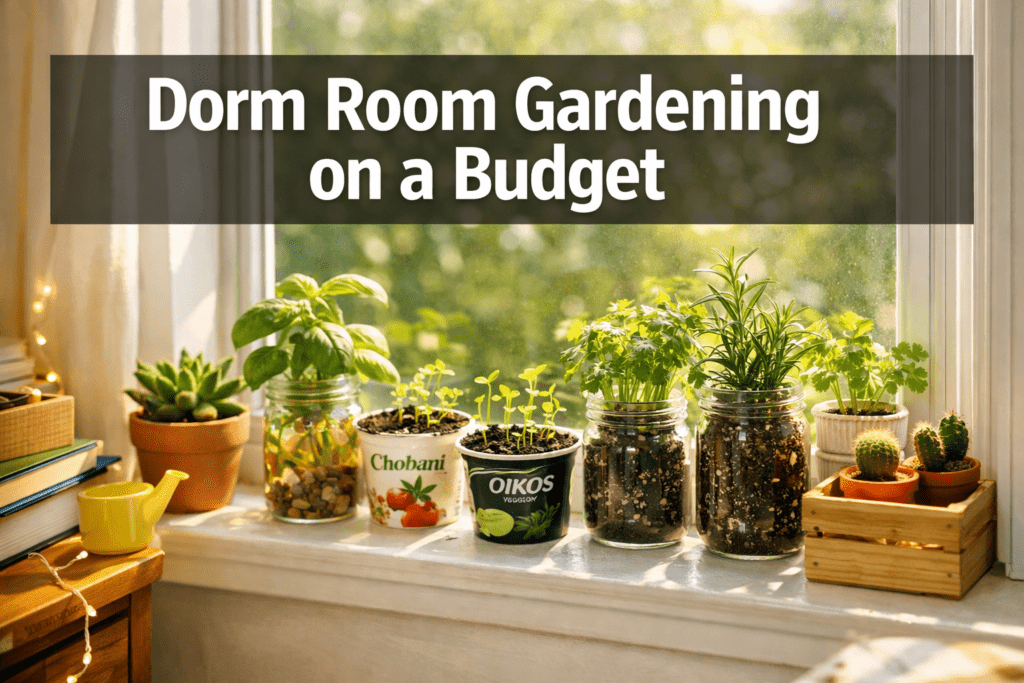
Quick Answer: You can start gardening in a dorm room on a tight budget by growing small plants — herbs, succulents, or microgreens — in repurposed containers on a windowsill or under an inexpensive LED grow light. A basic setup costs as little as $10 to $20 total. No outdoor space, no experience, and no large budget required.
Key Takeaways
- 🌱 Start with herbs or microgreens — they grow fast, need minimal space, and cost almost nothing in seeds.
- 💡 A south- or east-facing window provides enough light for most beginner plants; a $10–$15 LED grow light covers low-light rooms.
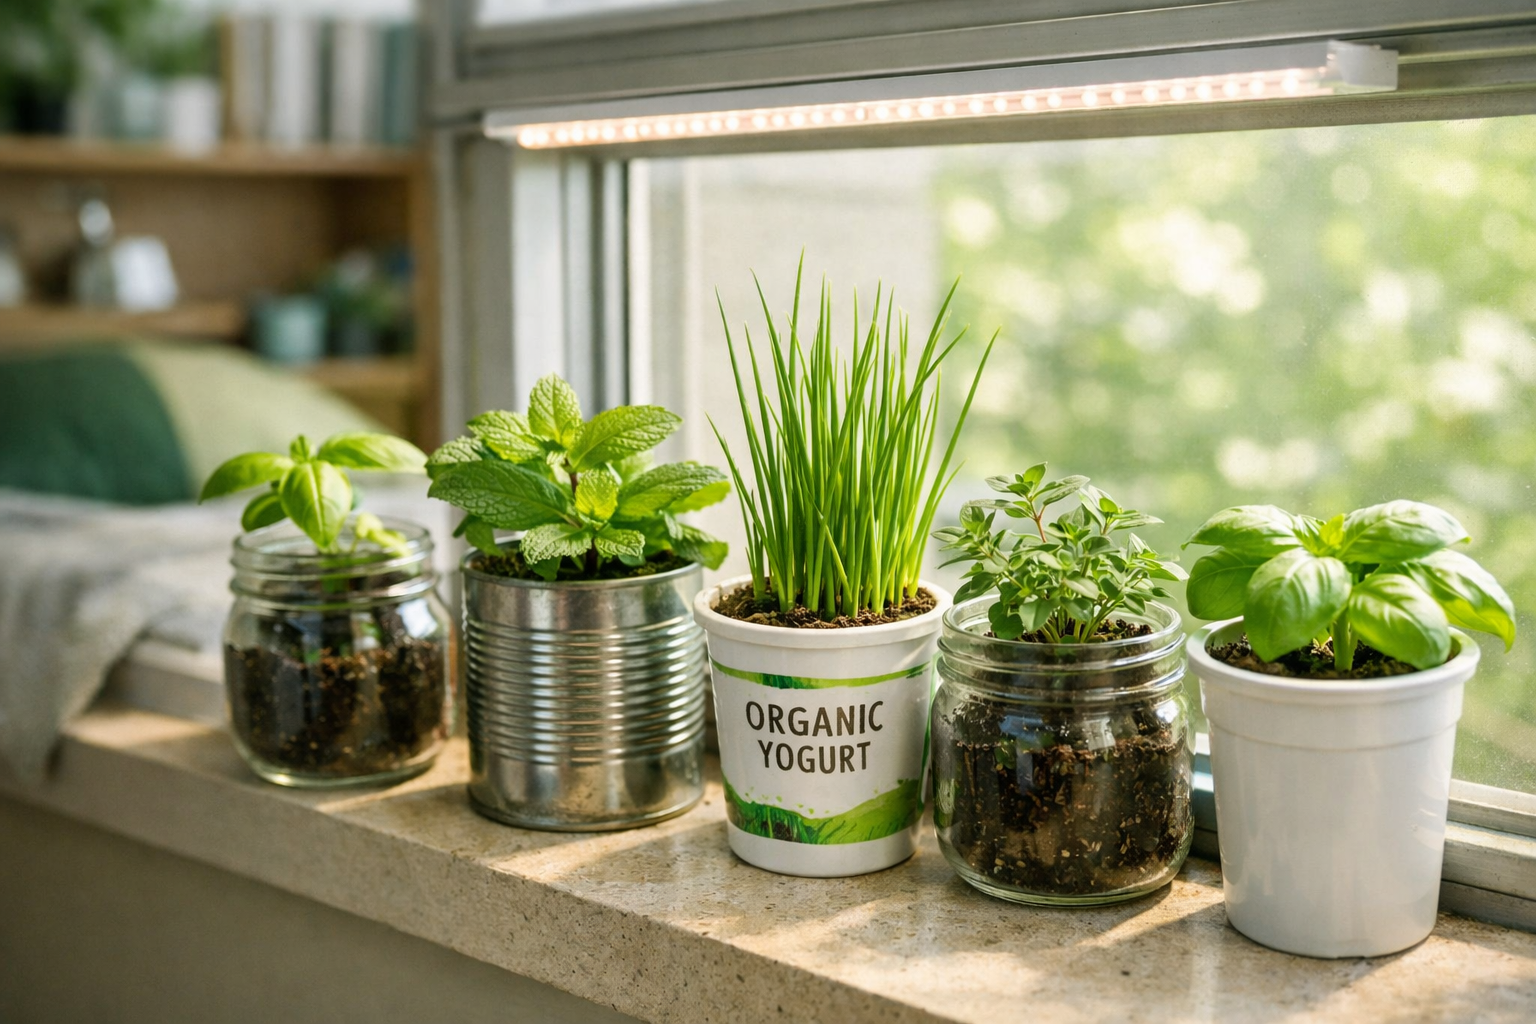
- 🪴 Repurpose containers — yogurt cups, mason jars, and tin cans work just as well as store-bought pots.
- 💰 Your total starter budget can be under $20 if you buy seeds in bulk and mix your own soil.
- 🚫 Avoid overwatering — it’s the number one mistake new indoor gardeners make.
- 📋 Check dorm rules first — some schools restrict soil, standing water, or certain plant types.
- 🌿 Pothos, basil, and lettuce are the three most forgiving plants for dorm beginners.
- 🔄 Reuse and recycle — coffee grounds, eggshells, and vegetable scraps can enrich your soil for free.
Why Dorm Room Gardening Is More Practical Than You Think
Dorm room gardening works because plants don’t need much — they need light, water, and a container with drainage. That’s it. You don’t need a yard, a greenhouse, or a big budget. In 2026, college students across the U.S. are growing fresh herbs on windowsills and harvesting microgreens on their desks in under two weeks.
If you’ve been asking “how can I start gardening in a dorm room on a tight budget?” the short answer is: start small, start cheap, and start with the right plants.
The psychological benefits are real too. Studies in environmental psychology consistently link tending plants to reduced stress and improved focus — two things every college student needs.
What Do You Actually Need to Get Started?
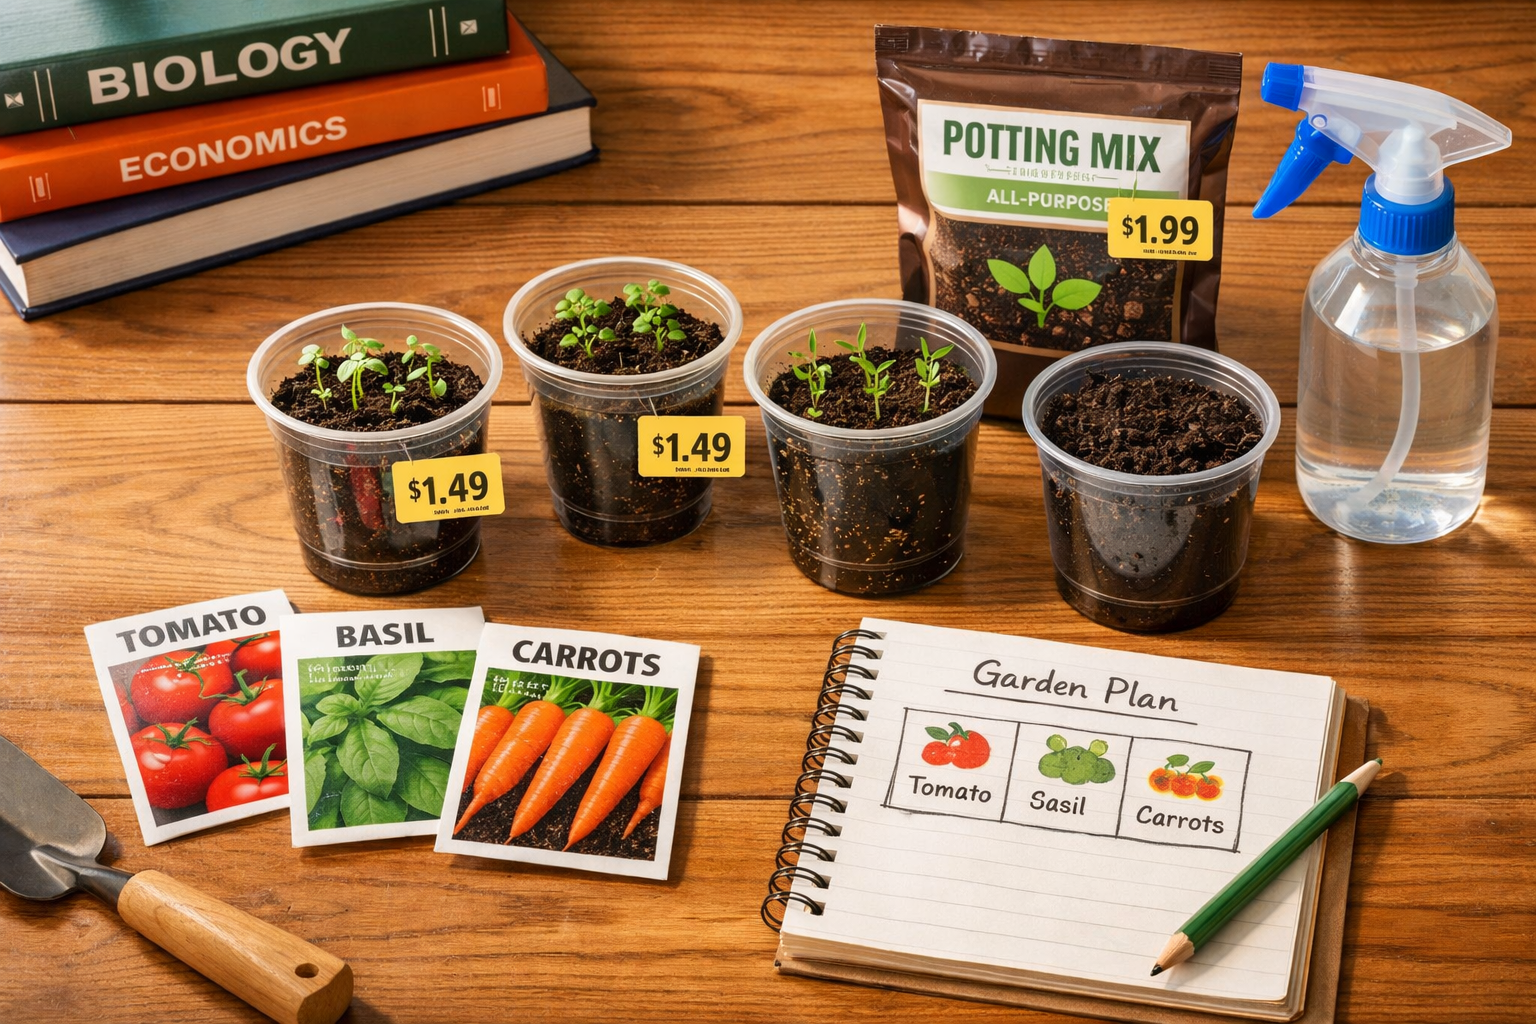
You need four things: a container, soil, seeds, and light. Everything else is optional.
Here’s a realistic starter checklist:
| Item | Budget Option | Estimated Cost |
|---|---|---|
| Container | Repurposed yogurt cup, mason jar, tin can | $0 |
| Potting mix | Small bag from a dollar store or garden center | $3–$5 |
| Seeds | Herb seed packets (basil, chives, cilantro) | $1–$3 each |
| Light | South-facing window OR a basic LED grow light strip | $0–$15 |
| Drainage | Poke holes in the bottom of your container | $0 |
| Watering tool | A plastic spray bottle | $1–$2 |
Total realistic startup cost: $5 to $25, depending on what you already have at home.
For a deeper look at container options, see this guide to the best containers for gardening, including DIY ideas.
Common mistake: Buying a full bag of premium potting mix when a small bag is plenty for two or three containers. Buy only what you need.
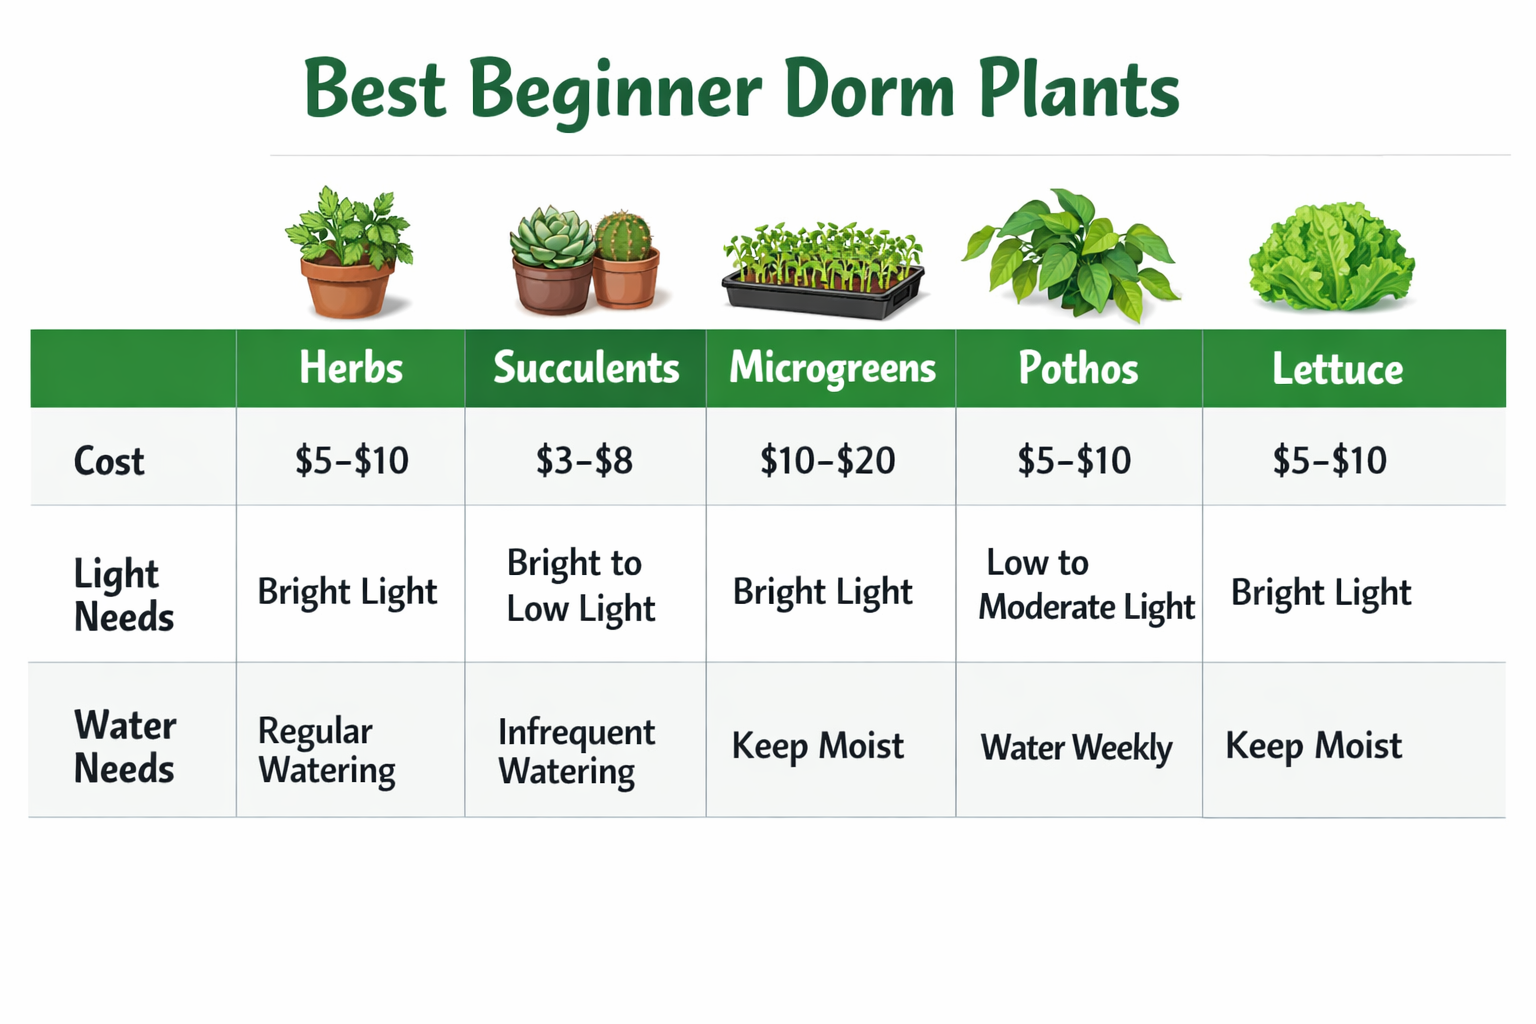
How Can I Start Gardening in a Dorm Room on a Tight Budget — Choosing the Right Plants
The best plants for dorm room gardening are ones that grow fast, tolerate indoor conditions, and don’t need much space. For beginners on a budget, stick to herbs, microgreens, or low-maintenance houseplants.
Best Beginner Plants for Dorm Rooms
Herbs (easiest to grow, most useful):
- Basil — grows in 3–4 weeks, loves a sunny windowsill
- Chives — nearly indestructible, regrows after cutting
- Mint — spreads fast; keep it in its own container
- Cilantro — quick to sprout, great for cooking
Microgreens (fastest results):
- Ready to harvest in 7–14 days
- Grow in a shallow tray with just an inch of soil
- Seeds are cheap and widely available
Low-maintenance houseplants:
- Pothos — thrives in low light, nearly impossible to kill
- Succulents — need almost no water, perfect for forgetful students
- Spider plant — tolerates neglect and purifies air
For a full breakdown of plants that work well in low-light spaces, check out this indoor gardening without sunlight guide.
💬 Choose herbs if you want something useful in the kitchen. Choose pothos or succulents if you want something decorative that practically takes care of itself.
How Can I Start Gardening in a Dorm Room on a Tight Budget — Step-by-Step Setup
Follow these six steps to get your dorm garden growing without wasting money.
- Check your dorm policy. Some schools prohibit soil, standing water, or certain plant types. A quick email to your RA saves headaches later.
- Pick your spot. A windowsill with 4+ hours of light daily works for most herbs. If your room faces north or gets little sun, a basic LED grow light strip (around $12–$15 online) solves the problem.
- Choose your container. Rinse out a yogurt cup, tin can, or plastic bottle. Poke 3–5 small holes in the bottom for drainage. Place a small plate or tray underneath to catch water.
- Fill with potting mix. Use a standard indoor potting mix — not garden soil, which compacts too much in containers. Fill to about an inch below the rim. See our guide on the best soil mix for container gardening for specifics.
- Plant your seeds. Follow the seed packet depth instructions. Most herb seeds go about ¼ inch deep. Mist the surface with a spray bottle — don’t soak it.
- Water carefully. Check the soil every 1–2 days. Water only when the top inch feels dry. Overwatering kills more dorm plants than anything else.
For more beginner-friendly guidance, the beginner indoor gardening tips guide covers common pitfalls in detail.
How Do I Keep Costs Down After the Initial Setup?
The cheapest ongoing strategy is to reuse, regrow, and recycle. Once your initial plants are established, you can cut costs to nearly zero.
Budget-Saving Strategies That Actually Work
- Regrow from scraps: Green onion roots, lettuce stumps, and herb stems can regrow in a glass of water on your windowsill — free food.
- Save seeds: Let one basil plant flower and go to seed. Collect the seeds for your next planting cycle.
- Make your own fertilizer: Diluted used coffee grounds or crushed eggshells add nutrients to soil at no cost.
- Share with roommates: Split a seed packet and a bag of soil. The cost drops by half instantly.
- Buy seeds in bulk: A $3 seed packet often contains 200+ seeds. That’s months of growing.
For more money-saving ideas, this indoor gardening on a budget guide goes deeper on stretching every dollar.
Edge case: If your dorm bans soil entirely, try hydroponic growing in a jar of water with a few drops of liquid fertilizer. Basil, mint, and green onions all grow well this way with zero mess.
What Are the Most Common Mistakes to Avoid?
The three most common mistakes are overwatering, choosing the wrong plants for your light conditions, and buying too much gear upfront. Each one is easy to avoid once you know what to watch for.
- Overwatering: More plants die from too much water than too little. Always check soil moisture before watering. Learn how to fix overwatered plants fast if you’ve already made this mistake.
- Wrong light: A north-facing window with no grow light will not support most herbs. Know your room’s light situation before buying plants.
- Buying too much upfront: Start with one or two plants. Once you see what works in your specific room, expand from there.
- No drainage: Containers without drainage holes cause root rot quickly. Always add holes or use a layer of pebbles at the bottom.
- Ignoring temperature: Dorm rooms near AC vents or drafty windows can stress plants. Keep plants away from direct cold air.
For a broader look at pitfalls, see this list of common indoor gardening mistakes to avoid.
FAQ: Dorm Room Gardening on a Budget
Q: Can I grow vegetables in a dorm room?
Yes, but stick to compact varieties. Lettuce, cherry tomatoes (in a sunny window), radishes, and microgreens all work in small containers indoors.
Q: Do I need a grow light?
Only if your room gets fewer than 4 hours of direct sunlight daily. A basic LED strip light costs $10–$15 and runs on a standard outlet.
Q: What’s the cheapest possible way to start?
Regrow green onions or lettuce from grocery store scraps in a glass of water. Total cost: $0.
Q: How often should I water dorm plants?
Check every 1–2 days. Water only when the top inch of soil is dry. Most herbs need water every 2–3 days in a warm dorm room.
Q: Will my RA let me have plants?
Most dorms allow small potted plants. Soil, standing water trays, and grow lights are occasionally restricted. Check your housing policy or ask your RA directly.
Q: What if my room has no windows?
A $12–$15 LED grow light on a 12-hour timer is enough for herbs and microgreens. Growing plants without sunlight indoors is very doable with the right light source.
Q: How long until I see results?
Microgreens sprout in 3–5 days and are ready to eat in 7–14 days. Herbs like basil show seedlings in 5–10 days and are harvestable in 3–4 weeks.
Q: Can I use regular garden soil from outside?
No. Outdoor soil compacts in containers, drains poorly, and may carry pests or disease. Use a bagged indoor potting mix.
Q: What’s the best herb to start with as a total beginner?
Chives. They’re nearly indestructible, grow back after cutting, and tolerate inconsistent watering better than most herbs.
Q: How do I prevent bugs in my dorm room garden?
Use fresh potting mix (not outdoor soil), don’t overwater, and keep plants healthy. Most indoor pest problems come from stressed or overwatered plants.
Conclusion: Your First Steps to a Dorm Room Garden
Starting a dorm room garden in 2026 doesn’t require a green thumb, a big budget, or a lot of space. The answer to “how can I start gardening in a dorm room on a tight budget?” is straightforward: pick one or two beginner-friendly plants, use a repurposed container, grab a small bag of potting mix, and place everything near your best light source.
Your action plan for this week:
- Check your dorm’s plant policy.
- Pick one plant — basil, chives, or pothos are the safest bets.
- Find a container you already own and add drainage holes.
- Buy a small seed packet or a starter plant (under $3 at most grocery stores).
- Set a phone reminder to check soil moisture every two days.
That’s genuinely all it takes to start. Once you’ve kept one plant alive for a month, scaling up feels easy. For more ideas on expanding your setup, explore our beginner’s guide to container gardening and our indoor herb garden setup guide for your next steps.
References
- Soga, M., Gaston, K. J., & Yamaura, Y. (2017). Gardening is beneficial for health: A meta-analysis. Preventive Medicine Reports, 5, 92–99. https://doi.org/10.1016/j.pmedr.2016.11.007
- Kaplan, R., & Kaplan, S. (1989). The Experience of Nature: A Psychological Perspective. Cambridge University Press.
- University of Vermont Extension (2022). Growing Herbs Indoors. https://www.uvm.edu/extension