Soil Basics for Container Gardening: Your 2026 Essential Guide
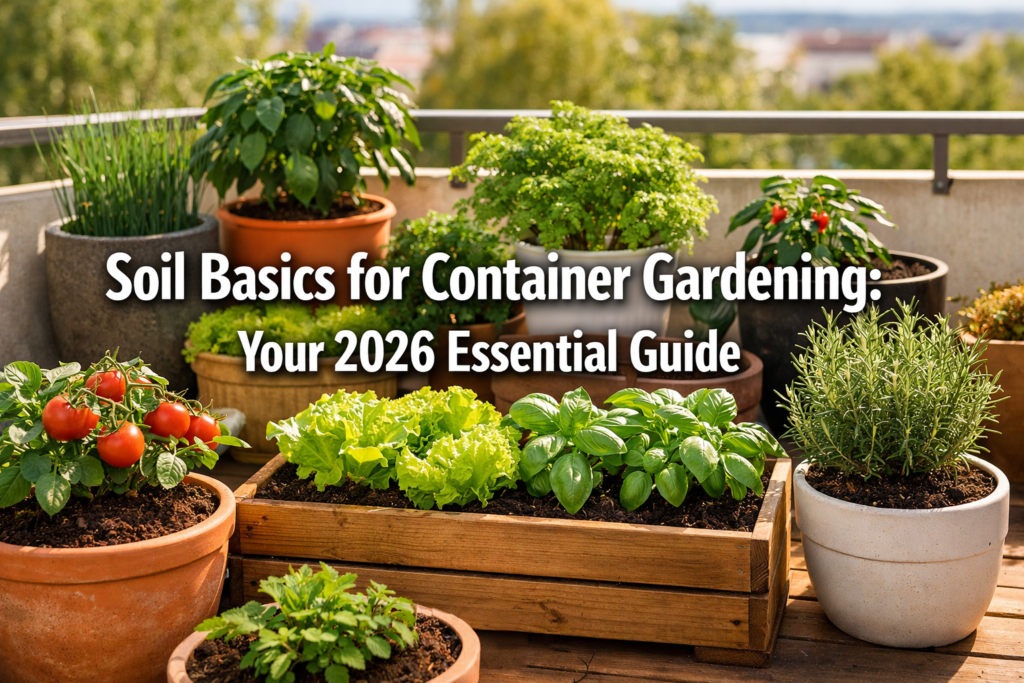
For successful container gardening, understanding “Soil Basics for Container Gardening” means recognizing that standard garden soil is unsuitable and a specialized potting mix is essential. This mix provides superior drainage, aeration, and a balanced nutrient profile, supporting healthy root development and robust plant growth in the confined environment of a pot, differing significantly from in-ground planting.
Key Takeaways
- Understanding “Soil Basics for Container Gardening” is crucial for plant health and success in confined spaces.
- Container plants require specialized potting mixes, not garden soil, for optimal drainage, aeration, and nutrient supply.
- The ideal potting mix includes components for structure (peat moss/coco coir), drainage (perlite/pumice), and nutrition (compost/worm castings).
- Proper soil moisture management and regular fertilization are vital for sustained plant growth in containers.
- Choosing the right potting mix based on specific plant needs significantly impacts root development and overall plant vitality.
What is the Best Soil for Container Gardening?
The best soil for container gardening is a high-quality, specialized potting mix, often labeled “potting soil” or “container mix,” designed to provide optimal drainage, aeration, and nutrient retention for plants grown in confined spaces. This type of soil ensures roots receive adequate oxygen and prevents waterlogging, which can lead to root rot. Unlike garden soil, potting mixes are sterile and lightweight, formulated specifically for the unique demands of containers.
Why You Can’t Use Garden Soil
Garden soil, while excellent for in-ground planting, is generally unsuitable for containers due to its density, susceptibility to compaction, and potential for harboring pests and diseases.
- Compaction: When confined to a pot, garden soil compacts easily. This reduces air pockets necessary for root respiration and impedes water drainage, leading to waterlogged conditions that suffocate roots.
- Poor Drainage: Garden soil typically holds too much water, especially in containers where gravity pulls water downward, creating a saturated layer at the bottom. This contrasts sharply with the excellent drainage provided by purpose-built potting mixes.
- Weight: Garden soil is heavy, making containers difficult to move and potentially adding excessive stress to elevated structures like balconies or shelves.
- Pests and Diseases: Untreated garden soil can introduce weeds, insect pests, and plant pathogens into your container garden, which can quickly spread in a closed system.
Key Characteristics of an Ideal Potting Mix
A superior potting mix for container gardening exhibits several crucial characteristics that facilitate healthy plant growth:
- Excellent Drainage: The mix should allow excess water to flow through freely, preventing standing water and root rot.
- Good Aeration: It must contain sufficient air pockets to provide oxygen to plant roots, which is vital for respiration and nutrient uptake.
- Water Retention: While draining well, the mix should also be able to hold enough moisture to keep plants hydrated between waterings.
- Lightweight: A lightweight mix makes containers easier to move and reduces stress on structures.
- Sterile: High-quality potting mixes are typically sterile, meaning they are free from weed seeds, pests, and disease pathogens.
- Nutrient-Balanced (Initially): Many potting mixes come with a starter charge of nutrients to support initial plant growth, though ongoing fertilization is usually required.
Choosing the Right Commercial Potting Mix
When selecting a commercial potting mix, consider the specific needs of your plants. Different formulations exist for various plant types:
- General Purpose Potting Mix: Suitable for most annuals, perennials, and vegetables.
- Seed Starting Mix: Finer texture, lower nutrient content, ideal for delicate seedlings.
- Cactus/Succulent Mix: Faster draining, often contains more sand or perlite to prevent root rot in arid-loving plants.
- Orchid Mix: Coarser, bark-based mix for epiphytic orchids that require exceptional aeration.
- Organic Potting Mix: Formulated with natural ingredients, often OMRI-listed for organic gardening practices.
Always read labels carefully to ensure the mix aligns with your gardening goals. For further guidance on plant selection, consult our article on the Best Plants for Small Gardens 2026: The Complete List.
What are the Essential Components of a Potting Mix for Container Gardening?
The essential components of a potting mix for container gardening typically include a base material for structure and water retention, amendments for drainage and aeration, and often some organic matter for slow-release nutrients. These ingredients work in synergy to create an optimal environment for root development, addressing the unique challenges of growing plants in confined containers.
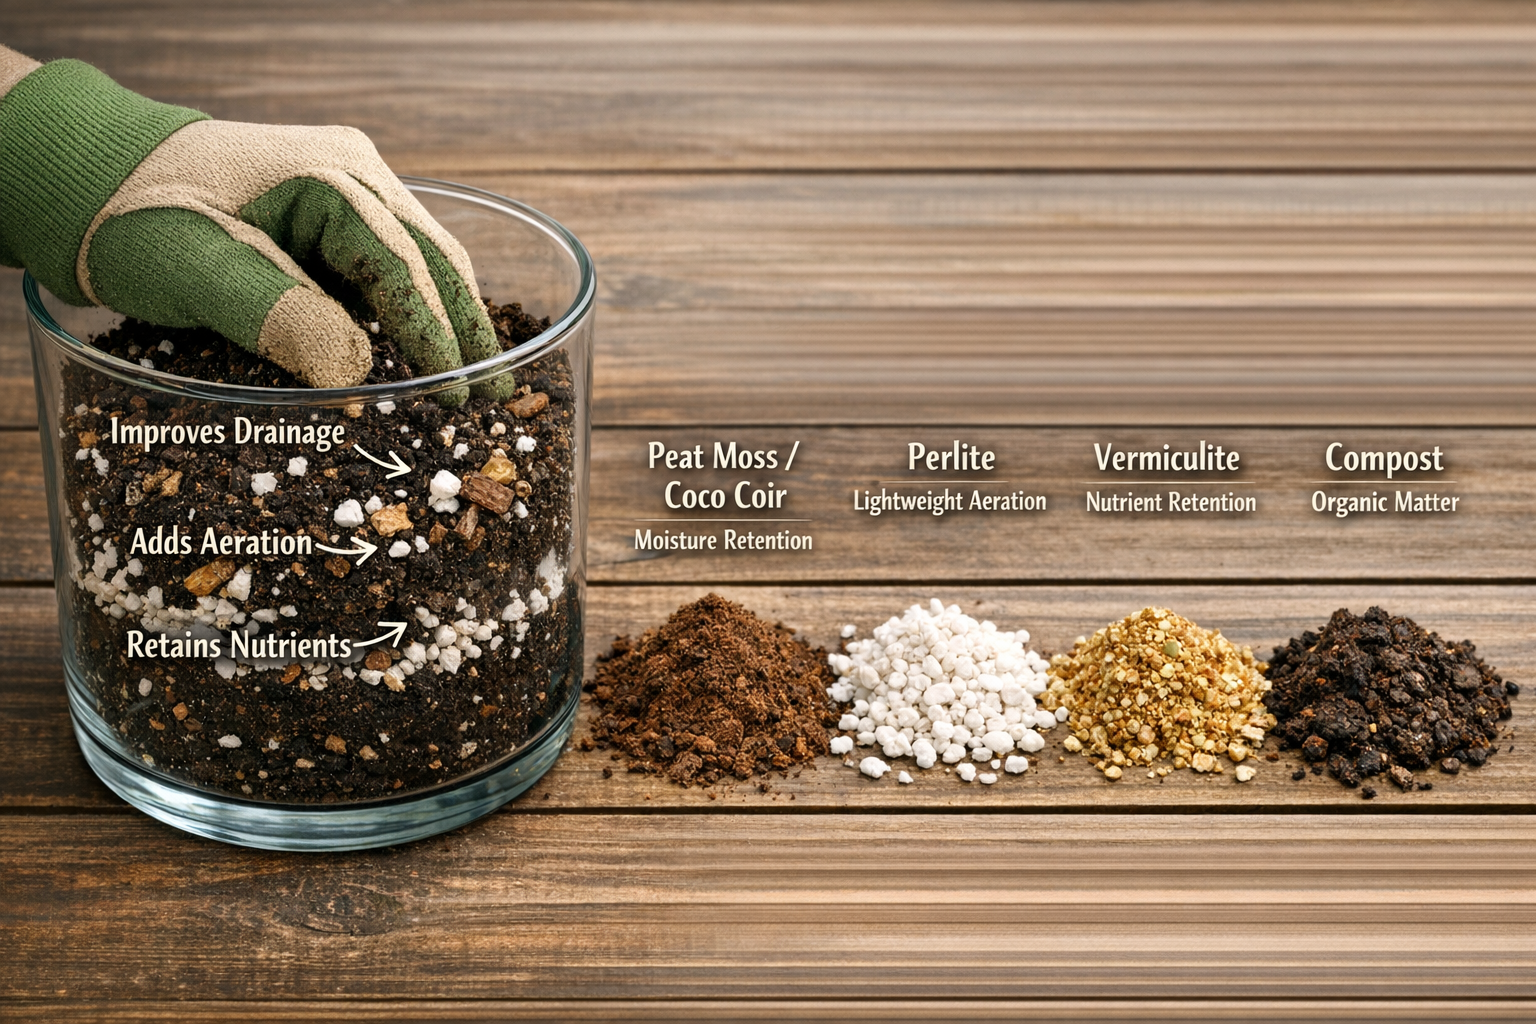
Core Ingredients and Their Functions
Understanding the role of each ingredient is fundamental to mastering “Soil Basics for Container Gardening.”
- Peat Moss or Coco Coir (Base Material): These fibrous materials form the bulk of most potting mixes.
- Peat Moss: Excellent at retaining water and nutrients, and it lightens the mix. It is naturally acidic, which benefits many plants but may require pH adjustment for others. Concerns about environmental sustainability have led many to seek alternatives.
- Coco Coir: A sustainable alternative to peat moss, derived from coconut husks. It also has excellent water retention and aeration properties, a more neutral pH, and is slower to decompose.
- Decision Rule: Choose coco coir if sustainability is a primary concern; choose peat moss for its acidity if growing acid-loving plants.
- Perlite or Pumice (Drainage & Aeration): These are lightweight, porous materials that prevent compaction and improve drainage.
- Perlite: Volcanic rock heated to expand, creating lightweight, white particles that increase air space and drainage.
- Pumice: A naturally occurring volcanic rock that performs similarly to perlite but is denser and holds up better over time, less prone to floating.
- Common Mistake: Using too little perlite or pumice can lead to waterlogged soil, especially in deep containers. Aim for at least 20-30% of the mix by volume for most plants.
- Vermiculite (Water & Nutrient Retention, Aeration): A mineral that expands when heated, creating lightweight, absorbent flakes.
- It improves water and nutrient retention more than perlite, while also increasing aeration.
- Often used in seed-starting mixes due to its fine texture and moisture-holding capacity.
- Composted Bark Fines or Aged Wood Chips (Structure & Aeration):
- Adds structure to the mix, preventing it from compacting over time.
- Improves drainage and aeration, particularly useful for plants that prefer fast-draining conditions, such as orchids or some perennials.
Optional Additives for Enhanced Performance
To further customize a potting mix, gardeners often incorporate various additives:
- Compost or Worm Castings:
- Provide a slow release of essential nutrients.
- Introduce beneficial microorganisms, improving soil health and nutrient cycling.
- Enhance water retention and overall soil structure.
- Edge Case: While beneficial, using too much uncomposted organic matter can lead to nutrient imbalances as it breaks down, potentially causing nitrogen depletion. Use well-composted materials.
- Sand (Coarse Horticultural Grade):
- Can improve drainage for succulents and cacti, but use only coarse horticultural sand, not fine play sand which can worsen compaction.
- Slow-Release Fertilizer:
- Provides a consistent supply of nutrients over several months, reducing the need for frequent liquid feeding.
- Mix directly into the potting medium according to package directions.
- Lime (Dolomitic Lime):
- Used to raise the pH of acidic potting mixes (like those heavy in peat moss) to a more neutral level, suitable for most vegetables and flowers.
- Mycorrhizal Fungi:
- Beneficial fungi that form a symbiotic relationship with plant roots, enhancing nutrient and water uptake.
Example Homemade Potting Mix Recipe (General Purpose)
Creating your own potting mix allows for customization and can be more economical for larger container gardens. This basic recipe is a good starting point:
| Ingredient | Ratio (by volume) | Purpose |
|---|---|---|
| Coco Coir or Peat Moss | 2 parts | Base, water retention, structure |
| Perlite or Pumice | 1 part | Drainage, aeration, prevents compaction |
| Vermiculite | 0.5-1 part | Water/nutrient retention, aeration |
| Composted Bark Fines | 0.5 part | Structure, aeration, slow decomposition |
| Worm Castings or Compost | 0.5 part | Nutrients, beneficial microbes |
| Total | 4.5-5 parts | Balanced mix for most container plants |
Mix all ingredients thoroughly before filling containers.
This approach to creating custom mixes is especially useful for a Vertical Gardening Guide for Small Spaces: Grow More in 2026 where specific plant needs might vary across different tiers or pockets.
How Do Drainage and Aeration Impact Container Plant Health?
Drainage and aeration are paramount for container plant health because they directly control oxygen availability to roots and prevent waterlogging, which can lead to root rot and nutrient deficiencies. Proper drainage ensures excess water leaves the pot, while good aeration maintains vital air pockets within the soil structure, allowing roots to respire and function effectively. Without these, even the most fertile soil will fail to support healthy growth.
The Role of Drainage in Container Gardening
Effective drainage prevents the accumulation of excess water in the bottom of the container, which is a common problem in pots compared to in-ground gardens.
- Prevents Root Rot: Roots require oxygen to survive. When soil remains saturated, oxygen is displaced, and roots can literally drown. This creates an anaerobic environment where harmful pathogens thrive, leading to root rot, a fungal disease that can quickly kill plants.
- Flushes Salts: As water evaporates from the soil surface, dissolved salts from fertilizers can accumulate. Good drainage allows regular watering to flush these excess salts out of the container, preventing salt burn and nutrient uptake issues.
- Supports Nutrient Uptake: Healthy, oxygenated roots are better able to absorb water and nutrients from the soil. Poor drainage stresses roots, impairing their ability to take up what they need.
The Importance of Aeration for Root Respiration
Aeration refers to the presence of air pockets within the potting mix, providing essential oxygen to plant roots.
- Oxygen for Respiration: Plant roots, like all living organisms, respire, meaning they take in oxygen and release carbon dioxide. This process is crucial for generating the energy needed for growth, water absorption, and nutrient transport.
- Prevents Compaction: A well-aerated potting mix resists compaction, which can happen over time as organic matter breaks down. Materials like perlite, pumice, and bark fines are key to maintaining this structure.
- Facilitates Beneficial Microbes: Many beneficial soil microorganisms that aid in nutrient cycling and disease suppression also require oxygen to thrive. Poor aeration can shift the microbial balance towards anaerobic, potentially harmful organisms.
Signs of Poor Drainage and Aeration
Recognizing these signs early can help save your container plants:
- Wilting Plants (Despite Moist Soil): A classic sign of root rot. The roots are too damaged to absorb water, even if available.
- Yellowing Leaves: Often indicates nutrient deficiencies (as damaged roots can’t absorb nutrients) or general plant stress.
- Stunted Growth: Plants will not grow vigorously if their roots are struggling.
- Foul Odor from Soil: An anaerobic, stagnant smell indicates severe lack of oxygen and decomposition.
- Water Standing on Surface or Draining Slowly: A clear indicator that the potting mix is too dense or the drainage holes are blocked.
Ensuring Optimal Drainage and Aeration
- Use the Right Potting Mix: Always choose a specialized container mix and avoid dense garden soil.
- Adequate Drainage Holes: Ensure containers have sufficient drainage holes at the bottom. Adding a layer of gravel at the bottom is a common myth; it actually raises the perched water table and can worsen drainage.
- Avoid Overwatering: Water only when the top inch or two of soil feels dry.
- Repotting: As potting mixes age, they can break down and compact. Repotting with fresh mix every 1-2 years helps maintain aeration and drainage.
- Amendments: If your mix seems too dense, add more perlite or pumice to improve aeration.
Proper drainage and aeration are non-negotiable for the health and longevity of your container plants, making these critical elements of “Soil Basics for Container Gardening.” This principle applies whether you’re tending to a few patio pots or managing a comprehensive Complete Balcony Gardening Guide for Small Apartments 2026.
How Do Nutrients and pH Affect Container Plants?
Nutrients and pH significantly affect container plants because pH controls the availability of nutrients, and without a steady supply of essential macro and micronutrients, plants cannot grow, flower, or fruit effectively. In containers, nutrient reserves are limited and must be actively managed, making fertilization and pH monitoring crucial for sustained plant health.
Essential Nutrients for Container Plants
Plants require both macronutrients (needed in larger quantities) and micronutrients (needed in smaller quantities) for healthy growth. In containers, these nutrients are often depleted faster than in garden beds due to frequent watering and the limited volume of soil.
Macronutrients
- Nitrogen (N): Promotes lush, green leafy growth. Essential for photosynthesis.
- Deficiency Sign: Yellowing of older leaves, stunted growth.
- Phosphorus (P): Crucial for root development, flowering, and fruiting.
- Deficiency Sign: Purplish tint to leaves, poor flowering.
- Potassium (K): Supports overall plant vigor, disease resistance, and water regulation.
- Deficiency Sign: Yellowing or browning of leaf edges, weak stems.
Micronutrients
- Iron (Fe), Manganese (Mn), Zinc (Zn), Copper (Cu), Boron (B), Molybdenum (Mo), Chlorine (Cl): Though needed in tiny amounts, micronutrients are vital for specific enzymatic functions and overall plant health.
- Deficiency Signs: Often appear as interveinal chlorosis (yellowing between leaf veins) or distorted new growth, depending on the specific nutrient.
Managing Nutrients in Container Soil
- Initial Nutrient Charge: Most commercial potting mixes come with a starter fertilizer, providing nutrients for the first few weeks.
- Regular Fertilization: After the initial nutrient charge is depleted, regular fertilization becomes necessary.
- Liquid Fertilizers: Fast-acting, applied with water. Ideal for providing immediate nutrients.
- Slow-Release Fertilizers: Granules mixed into the soil or applied to the surface, releasing nutrients over several months.
- Organic Amendments: Compost, worm castings, bone meal, blood meal can provide slow, natural nutrient release and improve soil biology.
- Follow Directions: Always adhere to fertilizer package instructions to avoid over-fertilization, which can burn roots and harm plants.
- Common Mistake: Over-fertilizing, especially with nitrogen, can lead to excessive leafy growth at the expense of flowers or fruit, and can also cause salt buildup.
The Importance of pH in Nutrient Availability
Soil pH (a measure of acidity or alkalinity) significantly influences how easily plant roots can access nutrients. Each nutrient becomes available at different pH ranges.
- Optimal Range: Most plants, especially vegetables and common ornamentals, thrive in a slightly acidic to neutral pH range (6.0 to 7.0).
- Acidic Conditions (Below 6.0): In very acidic soil, certain micronutrients (like iron and manganese) become more available, but macronutrients like phosphorus, calcium, and magnesium can become less accessible.
- Alkaline Conditions (Above 7.0): In alkaline soil, phosphorus, iron, and other micronutrients can become “tied up” and unavailable to plants, even if present in the soil.
Adjusting and Monitoring pH in Containers
- Start with a Balanced Mix: Most commercial potting mixes are formulated with a balanced pH, usually slightly acidic.
- Test Periodically: Use a simple soil pH test kit to monitor the pH, especially if plants show signs of nutrient deficiency.
- Adjusting pH:
- To Lower pH (Make More Acidic): Add elemental sulfur or acidic fertilizers. Peat moss is also naturally acidic.
- To Raise pH (Make More Alkaline): Add dolomitic lime or wood ash.
- Consider Plant Preferences: Some plants, like blueberries and azaleas, prefer acidic soil (pH 4.5-5.5), while others, like lavender, prefer slightly alkaline conditions. Always tailor your approach to the specific plant.
Understanding the interplay of nutrients and pH is a critical aspect of “Soil Basics for Container Gardening,” ensuring that your plants receive the nourishment they need to flourish. This knowledge is especially valuable when embarking on Small Space Vegetable Gardening: 2026 Step-by-Step Guide, where every plant’s output is highly valued.
How Do I Water Container Plants Effectively?

Effective watering for container plants involves understanding when to water, how much to apply, and recognizing the signs of both under- and overwatering to maintain optimal moisture levels without suffocating roots. Due to the limited volume of potting mix and increased exposure to air, container plants typically require more frequent watering than in-ground plants.
When to Water Container Plants
The most common mistake in container gardening is improper watering. Timing is key.
- Feel the Soil: The most reliable method is to insert your finger about 1-2 inches deep into the soil. If it feels dry at that depth, it’s time to water.
- Lift the Pot: Get accustomed to the weight of a newly watered pot versus a dry one. A significantly lighter pot indicates a need for water.
- Moisture Meters: Electronic moisture meters can provide a more precise reading, especially for larger or deeper containers.
- Observe the Plant: Wilting leaves are a clear sign of thirst, but try to water before plants reach this stage, as repeated wilting can stress them.
- Common Mistake: Watering on a strict schedule (e.g., every day) without checking soil moisture can lead to overwatering or underwatering, depending on weather and plant needs.
How Much Water to Apply
- Water Until Drainage: Water slowly and thoroughly until you see water draining from the bottom of the pot. This ensures the entire root ball is moistened.
- Drainage Tray: If using a drainage tray, empty any standing water promptly (within 30 minutes) to prevent roots from sitting in stagnant water, which can lead to root rot.
- Deep Watering: Deep watering encourages roots to grow downward, making the plant more resilient to short periods of drought.
Factors Influencing Watering Needs
Several factors dictate how often your container plants will need water:
- Container Size and Material:
- Small Containers: Dry out faster than large ones.
- Porous Materials (Terracotta): Promote evaporation through the sides, drying out quicker than plastic or glazed pots.
- Plant Size and Type:
- Large, Leafy Plants: Transpire more water, requiring more frequent watering.
- Succulents/Cacti: Tolerate dry conditions and prefer less frequent watering.
- Flowering/Fruiting Plants: Often need more water during bloom and fruit development.
- Weather Conditions:
- Hot, Sunny, Windy Weather: Increases evaporation and transpiration, requiring more frequent watering.
- Cool, Cloudy Weather: Decreases water demand.
- Potting Mix Composition: A mix with more peat moss or vermiculite will retain water longer than a very gritty, fast-draining mix.
Techniques for Effective Watering
- Top Watering: The most common method. Water gently from the top until water drains from the bottom.
- Bottom Watering (Soaking): Place the pot in a tray or basin of water and allow the soil to absorb moisture from the bottom up. This is particularly useful for very dry soil that has become hydrophobic (repels water). Remove when the top surface is visibly moist.
- Drip Irrigation/Self-Watering Planters: For larger collections or busy gardeners, these systems can provide consistent moisture, especially beneficial for Indoor Gardening for Small Homes & Apartments: 2026 Guide.
Signs of Underwatering vs. Overwatering
| Symptom | Underwatering | Overwatering |
|---|---|---|
| Leaves | Wilted, droopy, crisp, dry, brittle, often curled inward or downward. May turn yellow. | Wilted, droopy (but feel soft/limp), yellowing (often starting with older leaves), falling off. |
| Soil | Dry, hard, pulls away from pot edges. | Saturated, soggy, may have green algae or mold on surface. Foul odor. |
| Growth | Stunted, slow, no new growth. | Stunted, weak, rotting at soil line. |
| Roots | Dry, shriveled. | Soft, mushy, brown/black, often with a decaying smell (root rot). |
| Recovery | Often recovers quickly after thorough watering if not too severe. | Requires immediate action (repotting, improving drainage); recovery can be slow or impossible. |
Mastering watering techniques is perhaps the most critical skill in “Soil Basics for Container Gardening,” directly impacting the vitality and longevity of your plants. This skill is foundational to overall success, as detailed in the Ultimate Guide to Small Space Gardening for Beginners 2026.
What are the Common Mistakes in Container Soil Management?
Common mistakes in container soil management include using garden soil instead of potting mix, overwatering, neglecting nutrient needs, and failing to refresh aged potting soil, all of which can severely hinder plant growth and lead to health issues. These errors often stem from overlooking the fundamental “Soil Basics for Container Gardening” principles that differentiate container culture from in-ground planting.
1. Using Garden Soil
- Mistake: Filling containers with soil from your garden.
- Why it’s wrong: Garden soil compacts in pots, leading to poor drainage and aeration. It’s also heavy, can introduce pests, diseases, and weed seeds, and lacks the light, porous structure essential for container plants.
- Solution: Always use a high-quality, sterile potting mix specifically formulated for containers.
2. Overwatering
- Mistake: Watering too frequently or leaving pots in standing water.
- Why it’s wrong: Leads to waterlogged soil, displacing essential oxygen and causing root rot. This is a primary killer of container plants.
- Solution: Check soil moisture before watering (e.g., finger test 1-2 inches deep). Water until drainage occurs, then empty excess water from saucers. Allow the top layer of soil to dry out between waterings for most plants.
3. Neglecting Nutrient Needs
- Mistake: Assuming potting mix provides long-term nutrition or failing to fertilize.
- Why it’s wrong: Potting mixes typically have a limited initial nutrient supply that depletes quickly. Container plants are entirely dependent on you for replenishment.
- Solution: Incorporate slow-release fertilizer at planting or begin a regular liquid feeding schedule a few weeks after planting, following product instructions carefully.
4. Not Refreshing or Replacing Old Potting Mix
- Mistake: Reusing the same potting mix year after year without amendment or replacement.
- Why it’s wrong: Over time, organic components in potting mix break down, causing compaction and reducing aeration and drainage. Nutrients are depleted, and salt buildup can occur.
- Solution: Replace potting mix annually for heavy feeders or sensitive plants. For perennials or long-term plantings, refresh the top few inches of soil and amend with compost and new potting mix every 1-2 years.
5. Using Containers Without Drainage Holes
- Mistake: Planting in decorative pots or containers that lack drainage holes.
- Why it’s wrong: Water has nowhere to escape, creating a perpetually waterlogged environment that guarantees root rot.
- Solution: Always use containers with sufficient drainage holes. If using a decorative pot, drill holes or use it as a cachepot, placing a slightly smaller pot with drainage inside.
6. Misunderstanding “Bottom Layer” Drainage
- Mistake: Adding a layer of gravel, broken pottery, or rocks at the bottom of a container to “improve drainage.”
- Why it’s wrong: This is a gardening myth. A layer of coarse material creates a “perched water table” where water accumulates just above the coarser layer, ironically reducing the effective drainage zone for roots and making waterlogging worse.
- Solution: Simply use a good quality potting mix directly over the drainage holes. The potting mix itself is designed to manage drainage.
7. Incorrect pH Management
- Mistake: Not considering or adjusting the pH of the potting mix for specific plants.
- Why it’s wrong: Soil pH dictates nutrient availability. An incorrect pH can lock up essential nutrients, leading to deficiencies even if those nutrients are present.
- Solution: Most plants thrive in a slightly acidic to neutral pH (6.0-7.0). Use a pH test kit if issues arise and adjust with lime (to raise pH) or sulfur/acidic fertilizer (to lower pH) as needed, especially for specialty plants like blueberries.
Avoiding these common pitfalls by adhering to the foundational “Soil Basics for Container Gardening” will significantly increase your success and enjoyment of growing plants in pots.
How Can I Maintain Healthy Soil in My Containers Long-Term?
Maintaining healthy soil in containers long-term involves a proactive approach to nutrient replenishment, structural integrity, and pest management, as container environments are dynamic and finite. This means regularly amending, refreshing, and monitoring your potting mix to ensure it continues to support robust plant growth year after year.
1. Regular Nutrient Replenishment
As discussed, container soils quickly lose nutrients. Long-term health depends on consistent feeding.
- Fertilization Schedule: Establish a routine for applying liquid or slow-release fertilizers based on plant needs and the product’s recommendations. Heavy feeders like vegetables will need more frequent feeding than succulents.
- Organic Amendments: Incorporate a top dressing of worm castings or well-rotted compost periodically (e.g., every 2-3 months). These slowly release nutrients and enhance microbial activity.
- Micronutrient Check: If plants show signs of micronutrient deficiencies, consider a fertilizer that includes a full spectrum of trace elements.
2. Refreshing and Replacing Potting Mix
The physical structure of potting mix degrades over time, compacting and losing its ability to drain and aerate effectively.
- Annual Plants: For annuals, it’s generally best to discard and replace the entire potting mix each season. Old mix can be added to your compost pile.
- Perennials and Shrubs: For longer-lived plants, repotting every 1-3 years with fresh potting mix is essential.
- Repotting Process: Gently remove the plant, prune any circling or dead roots, carefully remove as much old soil as possible, and replant in a larger container with fresh mix or back into the same container with new soil if root pruning allows.
- Top Dressing: If full repotting isn’t feasible, carefully remove the top 2-3 inches of old soil and replace it with fresh potting mix mixed with compost.
3. Monitoring and Adjusting pH
Consistent pH levels prevent nutrient lockout and ensure plants can access what they need.
- Regular pH Checks: Use an inexpensive soil pH test kit every few months, especially if plants appear unhealthy.
- Target pH: Most container plants thrive between pH 6.0 and 7.0.
- pH Adjustments:
- To increase pH (make more alkaline): Mix in dolomitic lime.
- To decrease pH (make more acidic): Use elemental sulfur or an acid-specific fertilizer. Adjust gradually.
4. Preventing Salt Buildup
Frequent fertilization and evaporation can lead to the accumulation of soluble salts in the potting mix, which can burn roots and impair water uptake.
- Leaching: Periodically (e.g., once a month), water your containers thoroughly with plain water until a significant amount drains from the bottom. Let the water run for a few minutes to flush out excess salts.
- Use Balanced Fertilizers: Avoid over-fertilizing, which contributes to salt buildup.
5. Managing Pests and Diseases
Healthy soil, teeming with beneficial microbes, helps plants resist pests and diseases.
- Sterile Potting Mix: Always start with a sterile potting mix to avoid introducing pathogens.
- Inspect New Plants: Quarantine new plants briefly to ensure they don’t bring in pests.
- Good Air Circulation: Helps prevent fungal diseases in plants.
- Beneficial Organisms: Adding compost or worm castings can introduce beneficial microorganisms that help suppress disease.
- Prompt Action: If pests or diseases appear, address them quickly to prevent spread.
6. Avoiding Soil Compaction
Compaction degrades aeration and drainage, suffocating roots.
- Avoid Overpacking: When filling containers, lightly firm the soil; do not compact it tightly.
- Choose Durable Components: Use potting mix ingredients like perlite, pumice, and bark fines that resist breakdown and maintain structure longer.
- Gentle Watering: Avoid harsh streams of water that can flatten the soil surface.
By implementing these strategies, you ensure that the “Soil Basics for Container Gardening” principles are applied consistently, fostering a robust and productive growing environment for all your potted plants.
FAQ
Q1: Can I reuse old potting soil?
A1: Reusing old potting soil is generally not recommended for annuals or heavy feeders, as its structure degrades, and nutrients are depleted. For established perennials, you can amend with fresh mix and compost.
Q2: What is the ideal pH range for most container plants?
A2: Most container plants, including vegetables and common flowers, thrive in a slightly acidic to neutral pH range of 6.0 to 7.0.
Q3: Is adding gravel to the bottom of a pot for drainage a good idea?
A3: No, adding a layer of gravel or broken pottery at the bottom of a pot is a common myth that actually hinders drainage by creating a perched water table, which can lead to root rot.
Q4: How often should I fertilize my container plants?
A4: The frequency of fertilization depends on the plant type, potting mix, and fertilizer used. Generally, begin fertilizing a few weeks after planting and then regularly every 2-4 weeks for liquid fertilizers, or every 2-6 months for slow-release types.
Q5: What are the main differences between peat moss and coco coir?
A5: Peat moss is highly absorbent and naturally acidic, while coco coir is a sustainable alternative derived from coconut husks, has a more neutral pH, and is slower to decompose. Both provide good water retention and aeration.
Q6: Why do my container plants wilt even when the soil is moist?
A6: Wilting in moist soil is a classic sign of overwatering leading to root rot. The roots are damaged and cannot absorb water, even if it’s available. Improve drainage and allow the soil to dry out between waterings.
Q7: How can I tell if my potting mix has too much salt buildup?
A7: Signs of salt buildup include white crusts on the soil surface or container edges, stunted growth, and browning or yellowing leaf tips. Leaching the soil regularly with plain water helps prevent this.
Q8: What is the best way to test the soil moisture in my pots?
A8: The most reliable method is the finger test: insert your finger 1-2 inches deep into the soil. If it feels dry, it’s time to water. Lifting the pot to gauge its weight can also be an effective indicator.
Q9: Can I make my own potting mix?
A9: Yes, you can make your own potting mix by combining ingredients like coco coir or peat moss, perlite or pumice, vermiculite, and compost. This allows for customization based on specific plant needs.
Q10: What is the role of perlite in a potting mix?
A10: Perlite is a lightweight, porous material that significantly improves drainage and aeration in potting mixes by creating air pockets and preventing compaction, which is crucial for root health.
Key Takeaways
- Specialized Mixes Are Essential: Always use a purpose-designed potting mix for containers; garden soil is detrimental.
- Drainage and Aeration Are Paramount: Good drainage prevents root rot, and aeration provides roots with vital oxygen.
- Nutrients Are Finite: Container plants rely on you for regular nutrient replenishment through fertilization.
- pH Influences Nutrient Availability: Maintain an optimal pH range (6.0-7.0 for most plants) for efficient nutrient uptake.
- Water Wisely: Overwatering is a common killer; water based on soil moisture, not a fixed schedule.
- Avoid Common Mistakes: Steer clear of using garden soil, neglecting nutrients, and mismanaging drainage.
- Maintain Soil Long-Term: Refresh potting mix, leach salts, and monitor pH for sustained plant health.
- Understand Ingredients: Know the function of each component (e.g., peat moss for retention, perlite for drainage) to customize mixes.
- Observe Your Plants: Pay attention to signs of stress; they often indicate soil-related issues.
- Compost Boosts Health: Adding compost or worm castings improves soil structure and introduces beneficial microbes.
References
- Oregon State University Extension Service. (2018). Growing Plants in Containers. https://extension.oregonstate.edu/gardening/techniques/growing-plants-containers
- University of Maryland Extension. (2020). Container Vegetable Gardening. https://extension.umd.edu/resource/container-vegetable-gardening/
- The Old Farmer’s Almanac. (2023). Potting Soil 101: A Guide to Choosing and Using the Right Mix. https://www.almanac.com/potting-soil-101-guide-choosing-and-using-right-mix
- Purdue University Extension. (2017). Successful Container Gardens. https://www.extension.purdue.edu/extmedia/HO/HO-200-W.pdf