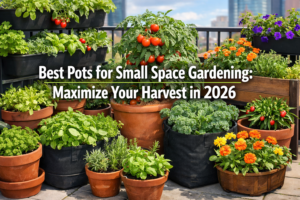
How to Start a Mini Garden at Home: Your 2026 Comprehensive Guide
Embarking on the journey of gardening can seem daunting, but starting a mini garden at home is an incredibly rewarding and accessible way to bring greenery and fresh produce into your daily life, no matter your space constraints. This guide will walk you through everything you need to know to successfully start a mini garden at home in 2026, transforming small spaces into vibrant, productive havens.
Key Takeaways
- Assess Your Space & Light: Before planting, understand the light conditions and physical space available for your mini garden.
- Choose the Right Plants: Select compact plant varieties suited for small containers and your specific climate/light.
- Essential Supplies: Gather appropriate containers, quality potting mix, and basic tools.
- Watering & Feeding: Learn the proper techniques for consistent watering and nutrient provision to ensure plant health.
- Pest & Disease Management: Proactively monitor and address common issues to protect your mini garden.
Quick Answer
To start a mini garden at home, begin by assessing your available light and space, then select suitable compact plants for containers. Gather essential supplies like pots with drainage, quality potting mix, and seeds or seedlings. Plant according to instructions, ensure consistent watering, provide adequate light, and routinely monitor for pests to cultivate a thriving small-scale garden.
What is a Mini Garden and Why Start One at Home in 2026?
A mini garden is a scaled-down version of a traditional garden, specifically designed for small spaces such as balconies, windowsills, patios, or even indoors. It focuses on growing compact plants in containers, raised beds, or vertical systems. Starting a mini garden at home in 2026 offers numerous benefits, including access to fresh produce, stress reduction, and a connection to nature, even in urban environments.
This type of gardening is perfect for urban dwellers, apartment residents, or anyone with limited outdoor space. It allows you to cultivate herbs, vegetables, flowers, and even small fruits in a manageable way. The appeal of a mini garden lies in its versatility and the ability to customize it to fit personal preferences and available resources.
Benefits of a Mini Garden:
- Fresh Produce at Your Fingertips: Grow your own herbs, vegetables, and fruits, ensuring fresh, organic ingredients for your meals.
- Space Efficiency: Maximizes the use of limited areas, turning small corners into productive green spaces.
- Stress Reduction & Well-being: Gardening is a known stress reliever, offering a therapeutic hobby that connects you with nature.
- Cost Savings: Reduce your grocery bill by growing frequently used items yourself.
- Educational Opportunity: A great way for individuals and families to learn about plant life cycles and sustainable living.
- Aesthetic Appeal: Adds beauty and life to your home environment, improving air quality.
For those living in apartments or small homes, a mini garden is often the only practical way to experience the joys of gardening. It’s a stepping stone to larger gardening projects or a fulfilling hobby in its own right. If you’re looking for more specific guidance on growing edibles in limited spaces, our article on Small Space Vegetable Gardening: 2026 Step-by-Step Guide offers additional insights.
How to Prepare Your Space to Start a Mini Garden at Home
To effectively start a mini garden at home, the first critical step is to thoroughly prepare your chosen space, which primarily involves assessing light availability, considering temperature and humidity, and planning for water access. Proper site preparation ensures your plants receive optimal conditions for growth and allows for efficient maintenance.
Begin by observing how sunlight tracks across your intended gardening area throughout the day. Most vegetables and herbs require at least 6-8 hours of direct sunlight daily to thrive. For indoor setups, identify south-facing windows for maximum light or consider supplemental grow lights. For balconies or patios, note any obstructions that might cast shadows.
Key Steps for Space Preparation:
Assess Sunlight Exposure:
- Observe Throughout the Day: Spend a day or two observing how much direct sunlight your chosen spot receives.
- Map Sun Paths: Note morning, midday, and afternoon sun exposure. South-facing windows typically offer the most light indoors.
- Consider Shading: Identify any buildings, trees, or awnings that might block sunlight.
- Rule of Thumb: Most fruiting vegetables (tomatoes, peppers) need 6-8 hours of direct sun. Leafy greens and many herbs can tolerate 4-6 hours.
Evaluate Temperature and Humidity:
- Indoors: Maintain a consistent room temperature (typically 65-75°F or 18-24°C) for most plants. Be mindful of drafts from windows or vents.
- Outdoors: Understand your local climate’s average temperatures and frost dates. Protect plants from extreme heat or cold. Some plants, like basil, prefer warmth, while others, like lettuce, thrive in cooler conditions.
- Humidity: Many plants, especially tropical varieties or seedlings, appreciate higher humidity. Indoors, a humidifier or pebble trays can help.
Plan for Water Access and Drainage:
- Proximity to Water Source: Ensure you can easily water your plants without extensive carrying or complex setups. A nearby faucet or rain barrel is ideal for outdoor spaces.
- Drainage: All containers must have drainage holes to prevent waterlogging, which can lead to root rot. Place saucers underneath indoor pots to catch excess water and protect surfaces.
- Catchment: Consider using drip trays or saucers to collect runoff, especially indoors or on balconies where water might drip onto neighbors below.
Consider Air Circulation:
- Prevention of Disease: Good air circulation helps prevent fungal diseases. Ensure plants aren’t too crowded.
- Outdoor Airflow: Balconies and patios generally offer good airflow.
- Indoor Airflow: A small fan can improve air circulation indoors, especially in humid environments.
Common Mistake: Ignoring light conditions is a common pitfall. Placing a sun-loving plant in a shady spot, or vice-versa, will lead to poor growth or plant death. Always match your plant choices to your available light. For guidance on optimizing small spaces, explore our “Indoor Gardening for Small Homes & Apartments: 2026 Guide” at https://minispacegarden.com/indoor-gardening-for-small-homes-apartments/.
[[IMAGE_PROMPT]]
Choosing the Right Plants for Your Mini Garden
Selecting the appropriate plants is crucial for the success of your mini garden at home, as not all plants thrive in compact conditions. Focus on varieties known for their compact growth habits and suitability for container cultivation, considering both your available light and your personal preferences.
When making your selections, prioritize edibles that you enjoy eating frequently, ensuring the effort you put into gardening yields satisfying results. Herbs, leafy greens, and specific compact vegetables are often excellent choices for beginners due to their relatively quick growth and high yield in small spaces.
Top Plant Choices for a Mini Garden:
Herbs:
- Basil: Loves sun and warmth. Great in pots.
- Mint: Very easy to grow, but can spread aggressively; best in its own container.
- Rosemary: Needs good drainage and sun.
- Thyme: Drought-tolerant and low-growing.
- Chives: Produces edible flowers and leaves, very hardy.
- Parsley: Prefers partial shade.
- Tip: Many herbs can be grown from cuttings, offering a cost-effective way to expand your garden.
Leafy Greens:
- Lettuce (loose-leaf varieties): Quick growing, can be harvested “cut-and-come-again.”
- Spinach: Best in cooler temperatures, can tolerate some shade.
- Arugula: Peppery flavor, grows fast.
- Swiss Chard: Beautiful and productive, tolerates various conditions.
Compact Vegetables:
- Radishes: Very fast-growing, ideal for beginners.
- Bush Beans: Unlike pole beans, these grow as compact bushes, suitable for pots.
- Dwarf Tomatoes: Look for varieties like ‘Tiny Tim,’ ‘Micro Tom,’ or ‘Patio’ which are bred for containers.
- Bell Peppers (dwarf varieties): Can be very productive in pots with sufficient sun.
- Cherry Tomatoes: Many varieties are well-suited for hanging baskets or large pots.
- Carrots (short/round varieties): ‘Paris Market’ or ‘Danvers Half Long’ are good for shallower containers.
Small Fruits:
- Strawberries: Excellent in hanging baskets or tiered planters.
- Dwarf Citrus (e.g., Calamondin orange): Requires significant light, often grown indoors or in warm climates.
Considerations When Choosing Plants:
- Sunlight Requirements: Match plants to the amount of light your space receives. Full sun (6+ hours) for most vegetables, partial sun (4-6 hours) for some leafy greens and herbs.
- Container Size: Consider the mature size of the plant and its root system. Deeper rooted plants like carrots need deeper pots.
- Climate & Season: Plant according to your local growing season. Some plants are warm-weather lovers, others prefer cooler conditions.
- Water Needs: Group plants with similar watering requirements together if possible.
- Pest Resistance: Some varieties are naturally more resistant to common pests, reducing maintenance.
Decision Rule: Choose compact, determinate varieties (for tomatoes, peppers) over indeterminate ones, as determinate plants grow to a specific size and produce fruit all at once, which is ideal for small spaces. Indeterminate varieties continue to grow and produce throughout the season, requiring more space and support. If you’re specifically looking for plants that thrive in small areas, our “Best Plants for Small Gardens 2026: The Complete List” provides an extensive resource.
Essential Supplies for Your Mini Garden Setup
Setting up a functional mini garden at home requires specific supplies that cater to the unique needs of container gardening. Gathering these items before you begin planting will streamline the process and provide a solid foundation for healthy plant growth.
The right containers, a high-quality growing medium, and a few basic tools are indispensable. Investing in good quality initial supplies can make a significant difference in the long-term success and ease of maintaining your mini garden.
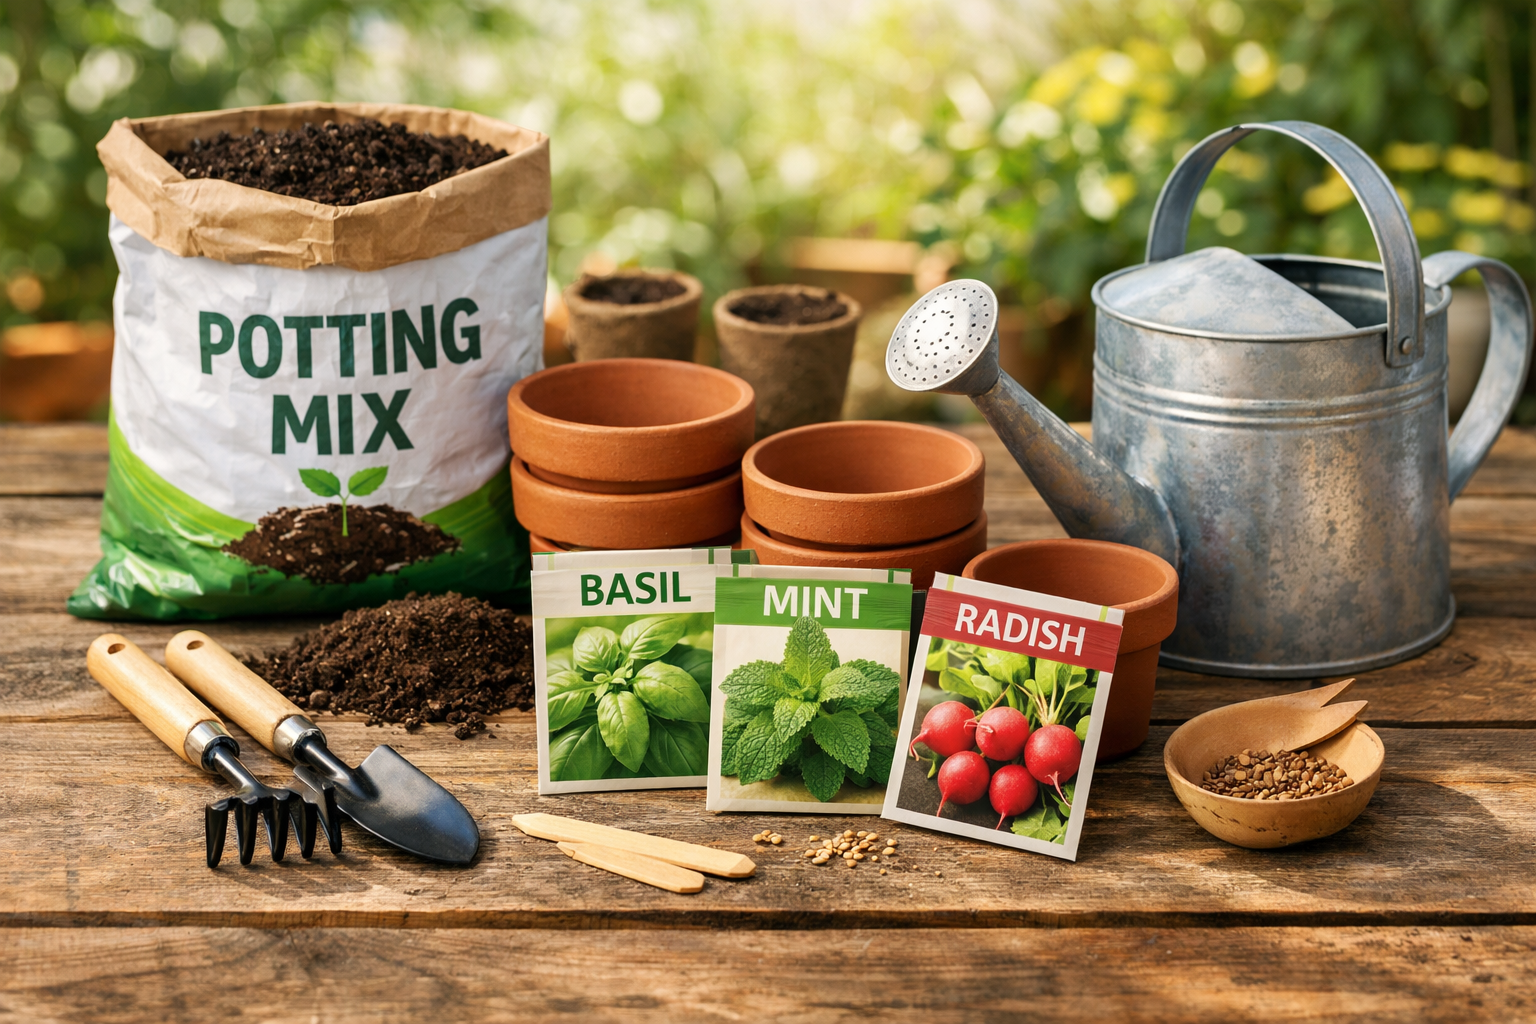
Key Supplies You’ll Need:
Containers:
- Variety: Choose pots, planters, grow bags, window boxes, or even repurposed items like old tires or buckets (ensure they are food-safe if growing edibles).
- Material: Terracotta, plastic, fabric, or glazed ceramic all work. Terracotta breathes well but dries out faster. Plastic retains moisture. Fabric grow bags promote air pruning of roots and are lightweight.
- Size: The size depends on the plant. Herbs and leafy greens can tolerate smaller pots (6-8 inches deep), while tomatoes and peppers need larger ones (at least 12-18 inches deep and wide).
- Drainage Holes: Crucial. Every container MUST have drainage holes to prevent root rot. If repurposing, drill holes if necessary.
- Saucers/Trays: For indoor plants or balconies, place saucers underneath to catch excess water and protect surfaces.
Potting Mix (Growing Medium):
- Not Garden Soil: Do not use regular garden soil in containers; it compacts too much, prevents drainage, and may contain pests or diseases.
- High-Quality Potting Mix: Opt for a good quality, sterile potting mix specifically designed for containers. This typically includes peat moss or coco coir, perlite or vermiculite for drainage and aeration, and sometimes slow-release fertilizer.
- Custom Mix: For specific plants, you might amend with compost for nutrients, or sand/grit for succulents requiring extra drainage.
Seeds or Seedlings:
- Seeds: More economical, offers a wider variety, but requires more patience and care during germination.
- Seedlings/Starts: Quicker results, less initial effort, good for beginners. Purchase healthy, sturdy plants from a reputable nursery.
- Consider Organic: Choose organic seeds or seedlings for a chemical-free garden.
Basic Tools:
- Trowel: For digging small holes and transplanting.
- Hand Pruners/Snips: For harvesting herbs, pruning, and deadheading.
- Watering Can/Spray Bottle: Essential for consistent and gentle watering. A long-spout watering can is great for reaching plants without disturbing soil.
- Gardening Gloves: To protect your hands.
Optional but Recommended Supplies:
- Fertilizer: Organic liquid fertilizer or slow-release granules for feeding your plants as they grow.
- Plant Tags/Markers: To remember what you planted where.
- Support Structures: Stakes, cages, or trellises for taller plants like tomatoes or climbing beans.
- Grow Lights: If growing indoors with insufficient natural light. Learn more about setups for small apartments in our Indoor Gardening for Small Homes & Apartments: 2026 Guide.
- Pest Control (Organic): Neem oil, insecticidal soap, or companion planting.
Choosing wisely: When selecting containers, think about aesthetics as well as functionality. Your mini garden is part of your home décor. For example, choose ceramic pots for a more elegant look or fabric grow bags for a minimalist, flexible approach.
Planting and Initial Care for Your Mini Garden
Proper planting and initial care are crucial for establishing a healthy and productive mini garden at home. This phase sets the foundation for your plants’ growth, requiring attention to detail from filling pots to providing the right amount of light and water.
Once you have your chosen plants and supplies, the process involves careful transplanting or seeding, followed by consistent watering and providing the ideal environmental conditions. These initial steps are where many common gardening mistakes occur, so taking your time will pay off.
Step-by-Step Planting Guide:
Prepare Your Containers:
- Ensure all containers have adequate drainage holes.
- If using new terracotta pots, soak them in water for 15-30 minutes beforehand to prevent them from wicking moisture away from the soil too quickly.
- Place a coffee filter or a piece of mesh over drainage holes to prevent soil from washing out, while still allowing water to escape. Avoid using gravel at the bottom; it doesn’t improve drainage and can hinder root growth.
Fill with Potting Mix:
- Fill your chosen containers with a high-quality potting mix, leaving about an inch or two of space from the rim. This prevents soil from spilling out when watering.
- Gently moisten the potting mix before planting. It should be damp, not soggy.
Planting Seeds:
- Follow the instructions on the seed packet for planting depth and spacing.
- Make small indentations with your finger or a trowel.
- Place seeds, cover gently with soil, and lightly pat down.
- Water gently with a spray bottle to avoid disturbing the seeds.
- Label your pots immediately with plant names and planting dates.
Planting Seedlings/Starts:
- Gently remove the seedling from its nursery pot, taking care not to damage the roots. If roots are tightly bound, gently loosen them at the bottom.
- Dig a hole in your prepared pot large enough to accommodate the root ball.
- Place the seedling in the hole, ensuring the top of the root ball is level with the surrounding soil. For tomatoes, you can plant them deeper to encourage more root growth along the stem.
- Fill in around the seedling with potting mix, gently patting down to remove air pockets.
- Water thoroughly immediately after planting.
Initial Care:
Watering:
- Consistency is Key: Keep the soil consistently moist but not waterlogged. Check the soil moisture daily by sticking your finger about an inch or two into the soil. If it feels dry, it’s time to water.
- Thorough Watering: Water until you see it draining from the bottom of the pot.
- Avoid Overhead Watering: Water the soil directly, not the leaves, to reduce the risk of fungal diseases, especially for new seedlings.
- Humidity for Seedlings: For seeds germinating indoors, a humidity dome or clear plastic wrap can help maintain moisture.
Light:
- Adequate Exposure: Ensure your plants are receiving the recommended amount of sunlight for their specific needs (e.g., 6-8 hours for most vegetables).
- Rotation: Rotate indoor plants every few days to ensure even light exposure on all sides, preventing them from leaning towards the light source.
- Grow Lights: If natural light is insufficient, especially during winter months or for indoor growing, supplement with LED grow lights.
Temperature:
- Ideal Range: Maintain temperatures suitable for your specific plants. Most common edibles thrive between 60-75°F (15-24°C).
- Protection: Protect tender plants from sudden cold snaps or extreme heat. Bring indoor plants inside if temperatures drop significantly.
Air Circulation:
- Prevent Disease: Good air circulation is important, especially for indoor plants, to prevent mold and fungal issues. A small fan can help.
- Spacing: Don’t overcrowd your plants, as this also improves airflow.
Edge Case: If you live in an extremely windy area (e.g., high-rise balcony), consider heavier pots or securing lighter pots to prevent them from blowing over. Wind can also dry out plants faster, requiring more frequent watering. For those with balconies, our “Complete Balcony Gardening Guide for Small Apartments 2026” provides specific strategies.
[[IMAGE_PROMPT]]
Watering, Fertilizing, and Ongoing Maintenance
Consistent watering, appropriate fertilization, and routine maintenance are the pillars of a thriving mini garden at home. These ongoing tasks ensure your plants receive the nutrients and attention they need to grow strong, produce well, and remain healthy throughout their lifecycle.
Unlike in-ground gardens, container plants have limited access to water and nutrients, making regular intervention from the gardener essential. Developing a routine for these tasks will lead to greater success.
Watering Strategies:
- Frequency: Check the soil moisture daily. A good rule of thumb is to water when the top inch or two of soil feels dry to the touch. The frequency will vary based on plant type, pot size, material, and weather.
- Method: Water deeply until water drains from the bottom of the pot. This encourages deep root growth. Avoid light, frequent sprinkles, which only wet the surface and can lead to shallow roots.
- Time of Day: Water in the early morning or late evening to minimize evaporation, especially during hot weather. Avoid watering during the hottest part of the day.
- Signs of Thirst: Wilting leaves are a common sign of underwatering. However, overwatering can also cause wilting due to root rot, so always check the soil moisture.
- Self-Watering Pots: Consider self-watering containers, which have a water reservoir, reducing the frequency of manual watering.
Fertilizing Your Mini Garden:
- Potting Mix Nutrients: Most potting mixes come with some initial nutrients, but these deplete quickly, usually within a few weeks to a month.
- When to Fertilize: Start fertilizing about 3-4 weeks after planting or transplanting.
- Type of Fertilizer:
- Organic Options: Liquid seaweed, fish emulsion, compost tea, or slow-release organic granules are excellent choices.
- Balanced NPK: Look for a balanced fertilizer (e.g., 5-5-5 or 10-10-10) for general growth, or one higher in phosphorus for fruiting plants.
- Specific Needs: Follow fertilizer instructions carefully, as over-fertilizing can burn roots.
- Frequency: Typically, fertilize every 2-4 weeks during the active growing season. Reduce or stop fertilizing in winter or when plants are dormant.
Ongoing Maintenance:
Pruning and Harvesting:
- Harvest Regularly: For herbs and leafy greens, regular harvesting encourages more growth and prevents plants from going to seed too soon (bolting).
- Pinch Back: Pinch back the growing tips of herbs like basil and mint to encourage bushier growth.
- Deadhead: Remove spent flowers (deadheading) from flowering plants to encourage more blooms and redirect energy to plant growth.
- Remove Diseased/Dead Leaves: Promptly remove any yellowing, diseased, or dead leaves to prevent the spread of issues.
Pest and Disease Monitoring:
- Daily Inspection: Regularly inspect your plants for signs of pests (tiny bugs, sticky residue, chewed leaves) or diseases (spots, discoloration, mold).
- Early Intervention: Catching problems early makes them easier to manage.
- Organic Solutions: Use organic pest control methods like neem oil, insecticidal soap, or simply hand-picking larger pests. Companion planting can also deter pests.
Support for Taller Plants:
- As plants like tomatoes, peppers, or climbing beans grow, they will need support.
- Provide stakes, small cages, or a mini trellis to keep them upright and prevent stems from breaking under the weight of fruit.
- For maximizing space, consider Vertical Gardening Guide for Small Spaces: Grow More in 2026.
Repotting:
- Root Bound: If plants become root-bound (roots circling the inside of the pot), they may need to be repotted into a larger container or have their roots lightly pruned and returned to the same pot with fresh soil. This usually occurs every 1-2 years for perennial plants.
Common Mistake: Overwatering is one of the most common mistakes for new gardeners, leading to root rot and plant death. Always check the soil moisture before watering. Under-fertilizing can also lead to nutrient deficiencies, manifesting as yellowing leaves or stunted growth.
Troubleshooting Common Mini Garden Problems
Even with the best intentions, mini gardens at home can encounter issues like pests, diseases, or nutrient deficiencies. Knowing how to identify and address these common problems promptly is key to maintaining a healthy and productive garden.
Early detection and appropriate action can often prevent minor issues from becoming major setbacks, saving your plants and your hard work. Always start with the least invasive solutions first.
Common Problems and Their Solutions:
Yellowing Leaves:
- Cause: Often a sign of nutrient deficiency (especially nitrogen), overwatering, or underwatering. It can also be a natural part of aging for lower leaves.
- Solution:
- Check Soil Moisture: Adjust watering habits.
- Fertilize: Apply a balanced liquid fertilizer.
- Identify Deficiency: If only older leaves are yellow, it might be nitrogen. If newer leaves are yellow with green veins, it could be iron.
- Ensure Drainage: Confirm pots have proper drainage.
Wilting Plants:
- Cause: Most commonly due to underwatering, overwatering (root rot), or extreme heat.
- Solution:
- Check Soil: If dry, water deeply. If soggy, allow to dry out before watering again.
- Provide Shade: In extreme heat, move plants to a shadier spot or provide temporary shade.
- Inspect Roots: If persistent, gently remove the plant to inspect for root rot (mushy, smelly roots).
Stunted Growth or No Flowers/Fruit:
- Cause: Insufficient light, lack of nutrients, incorrect temperature, or inadequate pollination for fruiting plants.
- Solution:
- Increase Light: Move to a brighter location or add supplemental grow lights.
- Fertilize: Provide a balanced fertilizer, or one higher in phosphorus for flowering/fruiting.
- Pollination: If growing fruiting plants indoors, you may need to hand-pollinate using a small brush or cotton swab.
- Temperature Check: Ensure the plant’s ideal temperature range is met.
Common Pests:
- Aphids, Spider Mites, Whiteflies, Fungus Gnats.
- Signs: Small bugs on leaves/stems, sticky residue (honeydew), webbing, yellowing or distorted leaves.
- Solution:
- Manual Removal: Spray with a strong stream of water, wipe off bugs with a damp cloth, or hand-pick.
- Insecticidal Soap/Neem Oil: Apply according to package directions, targeting undersides of leaves. These are organic and less harmful to beneficial insects.
- Companion Planting: Marigolds, nasturtiums, and herbs like mint can deter certain pests.
- Fungus Gnats: Often a sign of consistently wet soil. Let the top layer of soil dry out between waterings. Yellow sticky traps can also help.
Fungal Diseases (Powdery Mildew, Leaf Spot):
- Signs: White powdery spots on leaves, dark spots, or unusual growths.
- Cause: High humidity, poor air circulation, or overhead watering.
- Solution:
- Improve Airflow: Space plants out, use a small fan indoors.
- Water Correctly: Water the soil directly, not the leaves.
- Remove Affected Parts: Prune and discard diseased leaves or stems.
- Fungicides: Use organic fungicides like neem oil or baking soda spray (1 tsp baking soda per quart of water with a few drops of dish soap).
Edge Case: Leggy Seedlings: If your seedlings are tall and thin, stretching towards the light, they are “leggy” and not getting enough light. Solution: Move them closer to a light source or provide stronger grow lights. Ensure the light source is just a few inches above the seedlings. This is a common issue when starting seeds indoors. For more general guidance on gardening in small spaces, refer to our “Ultimate Guide to Small Space Gardening for Beginners 2026.”
Maximizing Yield and Space in Your Mini Garden
To get the most out of your mini garden at home, strategic planning and specific techniques are essential for maximizing both yield and the efficient use of limited space. This goes beyond basic care and involves clever design and cultivation practices.
By implementing methods like vertical gardening, companion planting, and succession planting, you can significantly increase the productivity and beauty of even the smallest mini garden. These techniques transform constraints into opportunities for creative growth.
Techniques for Maximizing Yield and Space:
Vertical Gardening:
- Utilize Upward Space: Grow plants upwards instead of outwards. This is one of the most effective ways to save space.
- Methods: Use vertical planters, tiered containers, wall-mounted pockets, trellises, or hanging baskets.
- Ideal Plants: Climbing vegetables (pole beans, cucumbers), strawberries, cherry tomatoes, and many herbs are excellent for vertical systems.
- Example: A small wall-mounted planter with three tiers can hold different types of lettuce, spinach, and herbs, creating a living wall that adds greenery and provides food without taking up floor space. Our “Vertical Gardening Guide for Small Spaces: Grow More in 2026” offers in-depth strategies.
Succession Planting:
- Staggered Planting: Instead of planting all of one crop at once, plant small batches every 2-3 weeks.
- Continuous Harvest: This ensures a continuous harvest rather than a single large one, which is ideal for small households.
- Suitable Crops: Leafy greens (lettuce, spinach, arugula), radishes, and bush beans are perfect for succession planting.
Companion Planting:
- Beneficial Pairings: Plant certain crops together that benefit each other. This can deter pests, attract beneficial insects, or improve growth.
- Examples:
- Marigolds near vegetables can deter nematodes and other pests.
- Basil near tomatoes is believed to improve tomato flavor and deter hornworms.
- Mint can deter ants and mice but should be kept in its own pot due to aggressive spreading.
- Nasturtiums can act as a trap crop for aphids, drawing them away from other plants.
- Resource: Research specific companion plant combinations for your chosen crops.
Intensive Planting / Square Foot Gardening Principles:
- Closer Spacing: In containers, you can often plant crops closer together than traditional row gardening, provided there’s enough soil depth and nutrients.
- Square Foot Idea: Imagine dividing your container into small squares; plant accordingly. For example, you might plant 9 spinach plants in one square foot.
- Caution: Ensure adequate airflow to prevent fungal diseases.
Choosing Compact Varieties:
- As discussed earlier, always select “dwarf,” “bush,” or “patio” varieties specifically bred for small spaces. These naturally grow smaller and produce fruit without requiring extensive room.
Optimizing Light:
- Rotation: Regularly rotate containers, especially indoors, to ensure all sides of the plant receive adequate light.
- Reflective Surfaces: Use white or reflective surfaces near plants to bounce light back onto them, especially for plants against a wall.
Smart Container Choices:
- Window Boxes: Great for herbs and leafy greens, utilizing narrow spaces.
- Fabric Grow Bags: Lightweight, promote air pruning, and easy to move.
- Tiered Planters: Excellent for maximizing vertical space for multiple plants.
Decision Rule: When choosing between two plants, select the one that offers a “cut-and-come-again” harvest (like lettuce or kale) over one that produces only a single crop (like a head of cabbage) if continuous fresh produce is your priority. This maximizes your yield over time from the same small footprint.
Conclusion
Starting a mini garden at home is a fulfilling endeavor that brings numerous benefits, from fresh produce to enhanced well-being, proving that limited space is no barrier to the joys of gardening. By understanding your space, selecting appropriate plants, gathering the right supplies, and committing to consistent care, anyone can cultivate a thriving small-scale garden in 2026. This comprehensive guide has equipped you with the foundational knowledge and practical steps to begin your journey, addressing everything from initial setup to troubleshooting and maximizing your yields.
The beauty of a mini garden lies in its adaptability and the personal touch you bring to it. Embrace the learning process, experiment with different plants and techniques, and most importantly, enjoy the connection you forge with nature right in your own home.
Key Takeaways
- Space Assessment is First: Always start by evaluating your light and physical space.
- Choose Wisely: Select compact plant varieties suited for container growing.
- Essential Gear: Invest in good quality containers, potting mix, and basic tools.
- Water & Feed Consistently: Container plants depend on you for all their water and nutrient needs.
- Stay Vigilant: Regular monitoring for pests and diseases prevents major problems.
- Maximize Space: Utilize vertical gardening and succession planting for better yields.
- Enjoy the Process: Gardening is a journey, not just a destination.
Actionable Next Steps:
- Observe Your Space: Spend a week noting how much sunlight your potential mini garden area receives daily.
- Research Plants: Based on your light assessment, research compact plant varieties you’d like to grow.
- Gather Supplies: Purchase a few appropriate containers, quality potting mix, and either seeds or small plant starts.
- Start Small: Begin with 1-3 easy-to-grow plants like basil, lettuce, or radishes to build confidence.
- Set a Routine: Establish a daily check-in for watering and a weekly routine for inspection and feeding.
Related Reading:
- Home – Mini Space Garden | Small Space Gardening Ideas
- Ultimate Guide to Small Space Gardening for Beginners 2026
Sources
- Cornell University Cooperative Extension (2023). Container Gardening.
- The Old Farmer’s Almanac (2025). Container Vegetable Gardening for Beginners.
- University of California Agriculture and Natural Resources (2024). Small Space & Container Gardens.